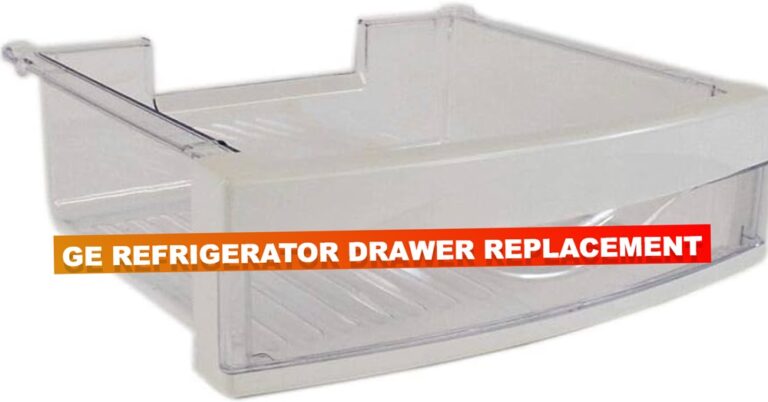

To replace a shelf in your GE refrigerator, first, identify the model number, and then purchase the correct replacement shelf from the manufacturer’s website or a retail store. Once you have the replacement shelf, simply remove the old shelf by sliding it out and inserting the new one in its place.
If you have a GE refrigerator and need to replace a shelf, it’s essential to have the correct replacement part. Identifying the model number and purchasing the shelf from the manufacturer or a retail store will ensure a proper fit.
Once you have the replacement shelf, the process is straightforward: remove the old shelf and insert the new one. With the right part and simple steps, your refrigerator will be back to full functionality in no time.
Benefits Of Upgrading Ge Refrigerator Shelves
Freshen up your kitchen with the sleek benefits of upgrading GE refrigerator shelves.
Increased Storage Capacity
Expand storage possibilities with upgraded GE refrigerator shelves. Say goodbye to cramped spaces!
Enhanced Organization
Effortlessly boost organization in your fridge with new GE shelves. No more cluttered chaos!
Credit: www.lowes.com
Choosing The Right Replacement Shelf
Compatibility With Your Ge Refrigerator Model
When it’s time to replace a shelf in your GE refrigerator, it’s crucial to ensure the replacement is compatible with your specific model. Refer to your refrigerator’s manual or check the manufacturer’s website to find the exact part number and dimensions for your refrigerator model. The replacement shelf must fit perfectly to maintain the integrity of your refrigerator’s storage and organization system.
Material And Durability
Opt for a replacement shelf made from high-quality and durable materials to ensure longevity and resistance to wear and tear. Look for shelves made from sturdy materials such as tempered glass or strong plastic that can withstand the weight of food items without warping or cracking. Durable shelves are essential for maintaining the functionality and safety of your refrigerator.
Step-by-step Guide To Replace Ge Refrigerator Shelf
Discover how to easily replace a broken GE refrigerator shelf with a step-by-step guide. Follow clear instructions for seamless shelf replacement. Maintain the efficiency of your fridge with this simple DIY solution.
Gather Necessary Tools
To begin replacing your GE refrigerator shelf, you will need to gather a few essential tools. These tools include a screwdriver, a pair of pliers, and a measuring tape. Having these tools ready will make the replacement process smoother and more efficient.
Remove the Old Shelf And Install a New One
1. Start by opening the refrigerator door and locating the shelf you wish to replace.
2. Carefully remove any items from the shelf and set them aside.
3. Take your screwdriver and unscrew any screws or brackets holding the old shelf in place. Be sure to keep track of these screws as you will need them later.
4. Use your pair of pliers to disconnect any clips or hooks securing the shelf to the refrigerator walls. Gently pull the old shelf out of its position and set it aside.
5. Measure the dimensions of the old shelf using your measuring tape. This step is crucial as it ensures the new shelf will fit perfectly into the available space.
6. Take your new GE refrigerator shelf and align it with the holes or brackets on the refrigerator walls. Ensure that it rests securely in place.
7. Insert the screws or brackets back into their original positions, using your screwdriver to tighten them snugly.
8. Double-check that the new shelf is properly installed and stable.
9. Finally, return the items you removed earlier back onto the new shelf, and close the refrigerator door.
By following this step-by-step guide, you can easily replace the shelf in your GE refrigerator. Remember to gather the necessary tools, remove the old shelf carefully, measure for the new one, and install it securely.
With proper installation, your refrigerator will continue to function efficiently and provide you with ample storage space.
Maintenance And Care Tips For Ge Refrigerator Shelves
Welcome to our guide on maintenance and care tips for GE refrigerator shelves. Keeping your refrigerator shelves clean and in good condition is crucial for the efficient operation and longevity of your appliance. In this section, we will provide you with essential tips on regular cleaning and sanitizing, as well as avoiding overloading the shelves.
Regular Cleaning And Sanitizing
Regular cleaning and sanitizing are essential to maintain the hygiene and freshness of your GE refrigerator shelves. Follow these simple steps to keep them in top condition:
- Remove all items from the shelf: Before cleaning, make sure to remove all items from the shelf to access the entire surface area.
- Wipe away spills and stains: Using a damp cloth or sponge, wipe away any spills or stains on the shelf. For stubborn stains, you can use a mild detergent mixed with water. Avoid abrasive cleaners that may damage the shelf surface.
- Sanitize with a food-safe solution: To ensure proper sanitation, mix a solution of equal parts water and white vinegar. Dip a clean cloth or sponge in the solution and wipe down the entire shelf, including the edges and corners.
- Dry the shelf: Once you have finished cleaning and sanitizing, make sure to dry the shelf thoroughly to prevent any moisture buildup that could lead to mold or mildew.
Avoiding Overloading The Shelves
Overloading refrigerator shelves can lead to improper airflow and affect the cooling efficiency of your appliance. Here are some tips to avoid overloading your GE refrigerator shelves:
- Follow the manufacturer’s guidelines: Check the user manual or guidelines provided by GE to determine the maximum weight capacity of your refrigerator shelves. Avoid exceeding this limit to prevent damage or breakage.
- Distribute items evenly: Distribute the weight of items evenly across the shelf to maintain balance and prevent the shelf from sagging or cracking.
- Avoid overcrowding: Leave enough space between items to allow proper airflow. Overcrowding can restrict the circulation of cold air, leading to uneven cooling and potential food spoilage.
- Consider using additional storage solutions: If you find that your refrigerator shelves are consistently overloaded, consider using additional storage solutions such as baskets or bins to optimize space and better organize your items.
By following these maintenance and care tips for your GE refrigerator shelves, you can ensure their longevity and the efficient operation of your appliance. Regular cleaning and sanitizing, along with avoiding overloading, will help you maintain a clean and organized refrigerator for years to come.
Troubleshooting Common Issues With Ge Refrigerator Shelves
When it comes to keeping your refrigerator in top condition, the shelves play a crucial role. Over time, you may encounter common issues with your GE refrigerator shelves, such as sagging or cracked shelves and difficulty in sliding or adjusting them. In this section, we’ll dive into troubleshooting these common issues to help you maintain the functionality of your refrigerator.
Sagging Or Cracked Shelves
If you notice your GE refrigerator shelves are sagging or have developed cracks, it’s essential to address this issue promptly. Sagging or cracked shelves can compromise the stability and safety of your food items. To troubleshoot this issue:
- Check for any signs of damage or wear and tear on the shelves.
- If there are visible cracks or sagging, you may need to replace the damaged shelves with genuine GE refrigerator shelf replacements.
- Inspect the frame and support components to ensure they are in good condition and properly support the shelves.
Difficulty In Sliding Or Adjusting
Having trouble sliding or adjusting your GE refrigerator shelves can be frustrating when trying to organize items. If you’re experiencing this issue, consider the following troubleshooting steps:
- Clean the shelf tracks and support brackets to remove any obstructions or debris that may be hindering the sliding mechanism.
- Check for any misalignment or damage to the sliding mechanism that may be affecting its functionality.
- Ensure that the shelves are properly positioned and aligned within the refrigerator compartment to allow for smooth sliding and adjusting.
By addressing these common issues with your GE refrigerator shelves, you can maintain the overall functionality and organization of your refrigerator, ensuring a seamless experience when storing and accessing your food items.
Frequently Asked Questions Of Ge Refrigerator Shelf Replacement
Can A Refrigerator Shelf Be Replaced?
Yes, a refrigerator shelf can be replaced easily by following the manufacturer’s instructions or hiring a professional technician.
How Do You Fix A Broken Refrigerator Shelf?
To fix a broken refrigerator shelf, remove the shelf and identify the break. Use epoxy adhesive to carefully glue the broken pieces together. Allow the adhesive to dry completely before replacing the shelf in the refrigerator. If the break is severe, consider purchasing a replacement shelf.
How Do You Put The Shelves Back In A Ge Refrigerator?
To put shelves back in a GE refrigerator, follow these steps:
- Remove any items from the shelf and clean it.
- Align the shelf with the brackets inside the refrigerator.
- Slide the shelf in until it fits securely.
- Test the shelf by gently pushing on it to ensure it’s properly in place.
- Repeat the process for other shelves if needed.
How Do You Replace A Refrigerator Door Shelf?
To replace a refrigerator door shelf, follow these steps:
- Empty the shelf and remove it from the door.
- If necessary, unscrew any screws holding the shelf in place.
- Take the new shelf and align it with the holes in the door.
- Screw the shelf securely into place.
- 5. Put back the items onto the shelf.
Conclusion
Replacing your GE refrigerator shelf can be a simple and cost-effective way to extend the life of your appliance. By following the steps outlined in this guide, you can ensure that your replacement process goes smoothly and that your refrigerator continues to function at its best.
Don’t delay in getting your new shelf and enjoying a properly organized refrigerator once again.
Hello Readers, I am Mechanic Shuvo, a seasoned refrigerator solution expert with over 11 years of hands-on experience in the field. Throughout my career, I've dedicated myself to understanding the ins and outs of refrigeration systems, honing my skills as a refrigerator mechanic. My passion for these appliances led me to create the website "refrigeratorsolutionsguide.com," where I aim to share my wealth of knowledge and expertise with others.
Over the years, I've encountered a wide range of refrigerator issues and have successfully resolved them all. From common problems like temperature fluctuations and strange noises to more complex technical issues, I've seen it all. Through my website, I hope to provide practical solutions, insightful tips, and guidance to help you keep your refrigerators running smoothly.