
Is your Frigidaire refrigerator not cooling properly? Or is the ice maker not producing enough ice? Don’t worry, you’re not alone. Frigidaire refrigerators are known for their reliability, but even the best appliances can experience problems from time to time.
The good news is that many common Frigidaire refrigerator problems can be easily fixed at home with a little troubleshooting. In this article, we’ll show you how to troubleshoot some of the most common Frigidaire refrigerator problems and provide quick and easy solutions.
Whether your refrigerator is not cooling properly, the ice maker is not working, or you’re experiencing another problem, we’ve got you covered. Read on to learn how to troubleshoot your Frigidaire refrigerator and get it back up and running in no time.
So what are you waiting for? If your Frigidaire refrigerator is experiencing problems, start troubleshooting today using the tips in this article. With a little effort, you’ll be able to fix the problem and get your refrigerator back to working like new.
Common Problems With Frigidaire Refrigerators
Is your Frigidaire refrigerator acting up? Don’t worry! In this section, we will discuss some of the most common problems that you may encounter with your Frigidaire refrigerator. By understanding these issues and their potential causes, you can troubleshoot and resolve them quickly and efficiently.
1. Not Cooling
- Insufficient Airflow: Check if the vents are blocked by food items or ice build-up. Clean the vents and ensure there is enough space around the unit for proper airflow.
- Dirty Condenser Coils: Dust and debris can accumulate on the condenser coils, causing them to work inefficiently. Regularly clean the coils to improve cooling performance.
- Malfunctioning Evaporator Fan: If the fan fails, cold air may not circulate properly, leading to inadequate cooling. Replace the fan if necessary.
2. Excessive Noise
- Fan or Motor Problems: Loose or worn-out fan blades or motors can create loud noises. Inspect these components and replace them as needed.
- Improper Placement: Ensure that the refrigerator is level and properly positioned. Uneven surfaces or proximity to other appliances can cause vibrations and noises.
- Obstructed Condenser Fan: Dirt or debris can interfere with the movement of the condenser fan, resulting in unusual sounds. Clear any obstructions for smooth operation.
3. Leaking Water
- Blocked Drain Tube: A clogged drain tube can cause water to accumulate and eventually leak. Clear the tube using a pipe cleaner or warm water to resolve the issue.
- Defective Water Inlet Valve: If the valve is damaged or worn out, it may not close properly, leading to water leakage. Replace the valve if necessary.
- Broken Water Filter: A damaged or incorrectly installed water filter can cause leaks. Check the filter’s condition and alignment to prevent any water-related issues.
By familiarizing yourself with these common problems, you can quickly identify potential issues with your Frigidaire refrigerator and take appropriate action. Remember to refer to the manufacturer’s guide for specific troubleshooting instructions and always prioritize safety when working with any electrical appliance.
Troubleshooting Steps For Frigidaire Refrigerator Issues
If your Frigidaire refrigerator is exhibiting problems, it can be frustrating and inconvenient. However, before panicking or calling a repair technician, there are several troubleshooting steps you can take to identify and resolve common issues with your appliance. By following this step-by-step guide, you can potentially save time and money by fixing the problem yourself.
Step-by-step Guide To Identifying And Resolving Common Problems
1. Checking Temperature Settings
The first step in troubleshooting your Frigidaire refrigerator is checking the temperature settings. Incorrect temperature settings can lead to problems like insufficient cooling or freezing of food. To ensure proper settings, follow these instructions:
- Locate the temperature control dial inside the fridge. It is usually located at the back or on the side.
- Make sure the dial is set to the recommended temperature for your model. Refer to the user manual or Frigidaire’s website for the appropriate temperature range.
- Adjust the temperature control dial if necessary, keeping in mind that it may take several hours for the changes to take effect.
2. Inspecting Seals
Another common issue that can affect the performance of your Frigidaire refrigerator is faulty door seals. Damaged or worn-out seals can lead to air leaks, causing the appliance to work harder and less efficiently. Follow these concise instructions to inspect the seals:
- Close the refrigerator door and inspect the rubber gasket around the edges for any signs of wear, cracks, or gaps.
- Check for proper alignment of the door when closed. If it seems misaligned, it might be causing the seals to become ineffective.
- If you notice any issues with the seals, clean them with warm, soapy water and a soft cloth. Make sure to dry them thoroughly before closing the door.
3. Cleaning Condenser Coils
Dirty or dusty condenser coils can hinder the cooling efficiency of your Frigidaire refrigerator. Regular cleaning of these coils is essential to ensure optimal performance. Follow these concise instructions to clean the condenser coils:
- Locate the condenser coils, usually located at the back of the refrigerator or behind a removable panel.
- Ensure the refrigerator is unplugged before cleaning the coils to prevent any accidents.
- Use a vacuum cleaner or a soft brush to remove the accumulated dust and debris from the coils.
- Once the coils are clean, plug the refrigerator back in and check if the cooling improves.
4. Clearing Clogged Drain Tube
If you notice water pooling inside your Frigidaire refrigerator, it could indicate a clogged drain tube. The drain tube is responsible for draining out the defrost water, and blockages can lead to leaks or ice buildup. Follow these concise instructions to clear the clogged drain tube:
- Locate the drain tube at the back of the refrigerator, usually near the bottom.
- Gently remove any visible debris or ice from the entrance of the drain tube using a cloth or a small brush.
- Using a mixture of warm water and mild detergent, flush the drain tube to remove any remaining blockages or buildup.
- Once the drain tube is clear, dry it thoroughly and ensure there are no more leaks or pooling water.
By following these troubleshooting steps, you can often fix common problems with your Frigidaire refrigerator without the need for professional help. However, if the issues persist or you’re unsure about performing any of the steps, it’s advisable to seek assistance from a qualified technician or contact Frigidaire’s customer support for further guidance.
Understanding Temperature Control Settings
When it comes to troubleshooting a Frigidaire refrigerator, understanding the temperature control settings is essential. These settings play a fundamental role in maintaining the optimum temperature inside the fridge, ensuring that your food stays fresh for longer periods.
In this section, we will delve into the explanation of temperature settings and their impact on refrigerator performance.
Explanation Of Temperature Settings And Their Impact On Refrigerator Performance
The temperature control settings on your Frigidaire refrigerator allow you to adjust the temperature inside the appliance to suit your specific needs. It’s important to understand how these settings work to ensure that your refrigerator operates efficiently and keeps your food at the optimal temperature.
The temperature control knob: Frigidaire refrigerators typically have a temperature control knob located inside the fridge. This knob allows you to adjust the temperature settings. The temperature is usually measured in degrees Fahrenheit or Celsius, and you can increase or decrease it by rotating the knob.
The impact of temperature settings: The temperature settings you choose for your refrigerator can have a significant impact on its overall performance. If you set the temperature too low, the fridge will have to work harder to maintain that temperature, resulting in increased energy consumption and potential wear and tear on the compressor. On the other hand, if you set the temperature too high, your food may not be stored at the ideal temperature, leading to spoilage and decreased freshness.
One important thing to note is that the temperature inside the refrigerator can vary depending on its location. The back of the fridge tends to be colder, while the door and upper shelves may experience slight temperature fluctuations. Consider these factors when setting the temperature to ensure even cooling throughout.
Ensuring Optimum Temperature Settings
Now that you are aware of the significance of temperature control settings, it’s important to ensure that you set the temperature properly for optimal refrigerator performance. Here are a few guidelines to follow:
- Consult the user manual: To determine the ideal temperature range for your Frigidaire refrigerator, refer to the user manual provided by the manufacturer. This manual will provide specific recommendations based on the model you own.
- Use a thermometer: To accurately monitor the temperature inside your fridge, consider using a refrigerator thermometer. This will help you determine if the temperature settings need adjustment or if there are any temperature variations in different areas of the fridge.
- Avoid frequent temperature changes: Try to avoid adjusting the temperature frequently, as it can disrupt the stability inside the refrigerator. Aim for a consistent temperature range rather than constantly changing it based on your immediate needs.
- Keep the refrigerator full: A full refrigerator tends to maintain temperature better than an empty one. If your fridge is not fully stocked with food, consider using containers or bottles filled with water to occupy the empty space, which helps regulate the temperature.
- Regularly clean and defrost: Dust and ice buildup can affect the temperature regulation of your refrigerator. Regularly clean the coils and defrost the freezer to ensure optimal performance and temperature control.
By following these guidelines, you can ensure that your Frigidaire refrigerator operates at the right temperature, keeping your food fresh and extending its shelf life.
Adjusting Temperature Settings
Introducing the feature of adjusting temperature settings, this section will guide you through the step-by-step process of optimizing the cooling function on your Frigidaire refrigerator. By gaining control over the temperature, you can ensure that the food stays fresh and any potential issues can be resolved. Let’s dive into the details!
Step-by-step Guide On How To Adjust Temperature Settings For Optimal Cooling
Here is a straightforward guide on adjusting the temperature settings of your Frigidaire refrigerator to achieve the ideal cooling conditions.
1. Locate the Temperature Control Panel: Begin by finding the temperature control panel on your Frigidaire refrigerator. Usually, it is placed on the top or front of the fridge compartment. Take a moment to familiarize yourself with the panel’s layout, as different models may have slight variations.
2. Understand the Temperature Control Options: Now that you have found the control panel, let’s understand the different temperature control options available. Most Frigidaire refrigerators offer two sections for temperature adjustment: the freezer and the fresh food or refrigerator unit. The settings typically range from 1 to 9, with 1 being the warmest and 9 being the coldest. Keep in mind that these settings may vary depending on your specific model.
3. Adjusting the Freezer Temperature: To regulate the temperature of the freezer, locate the temperature control slider or buttons dedicated to the freezer section. Move the slider toward the desired temperature setting. A lower number will result in a higher temperature, ideal for maintaining frozen foods without excessive freezing or ice buildup. Conversely, a higher number will achieve a lower temperature, ensuring your frozen goods remain frosty and ready for consumption.
4. Fine-tuning the Refrigerator Temperature: For the fresh food or refrigerator unit, you’ll find separate controls. Similar to adjusting the freezer temperature, use the dedicated refrigerator temperature control slider or buttons. Move the slider to select the desired temperature – a lower number for a warmer temperature, or a higher number for a cooler temperature. It is recommended to set the fresh food section between 34 and 40 degrees Fahrenheit (1 to 4 degrees Celsius) to maintain the freshness of your perishable items.
5. Allow for Stabilization: After adjusting both the freezer and refrigerator temperature settings, it is important to allow the fridge sufficient time to stabilize at the new temperature. This typically takes around 24 hours, during which the refrigerator will distribute the cool air evenly and achieve the desired cooling conditions.
6. Regular Monitoring and Fine-tuning: Once the stabilization period has passed, it is essential to periodically monitor the temperature to ensure it remains at the desired level. Use a reliable thermometer to confirm the accuracy and reliability of your Frigidaire refrigerator’s temperature settings. If necessary, make further adjustments, following the steps outlined above, to maintain optimal cooling performance.
Remember, each model may have slight variations in terms of temperature control panel placement and procedure. Therefore, it is crucial to consult your Frigidaire manual for model-specific instructions or refer to Frigidaire’s official website for detailed information. By following this step-by-step guide, you can effectively adjust the temperature settings of your Frigidaire refrigerator, optimizing its cooling capabilities and ensuring long-lasting freshness for your food items.
Checking And Replacing Thermistor
Instructions For Checking And Replacing The Thermistor
The thermistor is an essential component of a Frigidaire refrigerator that helps regulate the temperature, ensuring your food stays fresh and safe. If you notice temperature fluctuations or inconsistent cooling in your refrigerator, it may be due to a faulty thermistor.
In this section, we will guide you on how to check and replace the thermistor to restore proper functionality to your Frigidaire refrigerator.
Checking The Thermistor
Before proceeding with the replacement, it’s important to check whether the thermistor is indeed the source of the problem. Here’s how you can do it:
- Start by unplugging the refrigerator to ensure your safety.
- Locate the thermistor, which is typically attached to the inside wall of the refrigerator.
- Inspect the thermistor for any visible damage or signs of wear. If you notice any cracks, breaks, or loose connections, it is likely the thermistor is faulty and needs to be replaced.
- Using a multimeter set to the resistance mode, carefully disconnect the thermistor from its wiring harness.
- With the multimeter leads, touch the thermistor’s terminals and check the resistance reading. Consult your Frigidaire refrigerator’s manual for the recommended resistance range specific to your model.
- If the resistance reading is outside the recommended range, it indicates a faulty thermistor that needs replacement.
Replacing The Thermistor
If you have determined that the thermistor is indeed faulty, it’s time to replace it. Follow these steps:
- Start by ordering a compatible replacement thermistor for your Frigidaire refrigerator model.
- Once you have the replacement thermistor, ensure the refrigerator is still unplugged for safety.
- Locate the faulty thermistor and carefully disconnect it from its wiring harness.
- Connect the new thermistor to the wiring harness, ensuring a secure and proper connection.
- Safely position the new thermistor back onto the inside wall of the refrigerator, where the old one was located.
- Once you have completed the replacement, plug the refrigerator back into the power source.
- Monitor the refrigerator’s temperature over the next few hours to ensure the thermistor replacement resolves the issue.
By following these instructions, you can check and replace the thermistor in your Frigidaire refrigerator, helping restore reliable cooling performance and maintaining the freshness of your food. Remember to always prioritize your safety, and if you are unsure or uncomfortable with any step, it’s best to consult a professional technician.
Identifying The Source Of Noise
The first step in troubleshooting a noisy Frigidaire refrigerator is to identify the source of the noise. Excessive noise can be a nuisance, but it is often indicative of an underlying issue that needs to be addressed. By pinpointing the source of the noise, you can determine the best course of action to resolve the problem.
Guidance On Locating The Source Of Excessive Noise
When trying to identify the source of excessive noise in your Frigidaire refrigerator, it is helpful to inspect the common culprits: the compressor and the fan. The compressor is responsible for circulating refrigerant throughout the system, while the fan helps to dissipate heat and maintain proper airflow. Here are some steps to help you locate the source of the noise:
Inspecting The Compressor
- Begin by unplugging your refrigerator and removing any items from the freezer and refrigerator compartments.
- Locate the compressor, which is usually located at the back of the refrigerator.
- Visually inspect the compressor for any signs of damage or loose components. Look for oil spots, leaks, or broken parts.
- If you notice any issues with the compressor, it may be necessary to contact a professional technician for further diagnosis and repair.
Checking The Fan
The fan is typically located at the back of the refrigerator, near the compressor. It can sometimes become clogged with debris or develop a faulty motor, resulting in excessive noise. To check the fan:
- Unplug your refrigerator and remove any items from the freezer compartment.
- Access the fan by removing the rear panel of the freezer compartment, using a screwdriver if necessary.
- Inspect the fan blades for any visible signs of damage, such as bending or breakage. Additionally, check for any obstructions, such as ice buildup or debris.
- If you notice any issues with the fan, it may be necessary to clean the blades or replace the fan motor to alleviate the noise.
By identifying the source of the noise in your Frigidaire refrigerator, you can take the necessary steps to troubleshoot and resolve the issue. Whether it’s a problem with the compressor or the fan, addressing the source of the noise can help restore your refrigerator’s quiet operation and ensure it continues to function effectively.
Cleaning And Lubricating Moving Parts
Keeping your Frigidaire refrigerator in good working condition is essential for ensuring its longevity and optimal performance. One important aspect of refrigerator maintenance is regular cleaning and lubrication of the moving parts. This not only minimizes noise but also helps in preventing unnecessary wear and tear of the components.
In this guide, we will provide you with step-by-step instructions on how to clean and lubricate the various moving parts of your Frigidaire refrigerator.
Instructions For Cleaning And Lubricating Components To Minimize Noise
1. Cleaning the Condenser Coils
A dirty condenser coil can lead to increased noise levels and reduce the efficiency of your refrigerator. To clean the condenser coils, follow these steps:
- Unplug the refrigerator from the power source.
- Locate the condenser coils, typically located at the back or underneath the unit.
- Use a vacuum cleaner with a brush attachment to gently remove dust, dirt, and debris from the coils.
- If the coils are heavily soiled, you can use a coil cleaning brush or a soft bristle brush to scrub away the dirt.
- Once the coils are clean, plug the refrigerator back in.
2. Lubricating the Door Hinges
Noisy refrigerator doors can be quite annoying. Lubricating the door hinges can help reduce the noise and ensure smooth opening and closing. Follow these steps:
- Unplug the refrigerator from the power source.
- Locate the hinges on the refrigerator door(s).
- Apply a small amount of silicone-based lubricant to the hinge pivot points.
- Open and close the door several times to distribute the lubricant evenly.
- Plug the refrigerator back in.
3. Cleaning and Lubricating the Evaporator Fan Motor
The evaporator fan motor circulates the air inside the refrigerator, and if it becomes dirty or worn out, it can make excessive noise. Here’s how you can clean and lubricate the evaporator fan motor:
- Unplug the refrigerator from the power source.
- Locate the evaporator fan motor, usually found inside the freezer compartment.
- Use a soft cloth or brush to gently remove any dirt or debris from the motor and the fan blades.
- Apply a few drops of lightweight oil, such as sewing machine oil, to the motor’s lubrication ports.
- Plug the refrigerator back in.
By following these instructions, you can keep your Frigidaire refrigerator’s moving parts clean and well-lubricated, ensuring optimal performance and minimizing noise. Regular maintenance goes a long way in extending the lifespan of your refrigerator and preventing unnecessary repairs. Always refer to your Frigidaire refrigerator’s user manual for specific instructions and guidelines.
Replacing Faulty Parts
When it comes to troubleshooting a Frigidaire refrigerator, one of the most common tasks is replacing faulty parts. If you notice excessive noise coming from your refrigerator, it could be due to a worn-out fan motor or other components that need to be replaced.
In this section, we will provide you with guidance on how to replace these parts and get your refrigerator running smoothly again.
Guidance On Replacing Fan Motor
If your Frigidaire refrigerator is making a loud noise, it is highly likely that the fan motor is worn out and needs to be replaced. The fan motor is responsible for circulating air and maintaining the optimal temperature inside the refrigerator. Here are steps to guide you through the process of replacing the faulty fan motor:
- Turn off the refrigerator and unplug it from the power source to avoid any electrical mishaps. Safety should always be your top priority.
- Locate the fan motor, which is typically situated at the back of the refrigerator. Consult your Frigidaire refrigerator’s user manual if you’re having trouble finding it.
- Remove any screws, clips, or bolts that are securing the fan motor in place. Keep them in a safe place as you’ll need them when installing the new motor.
- Disconnect the wires connected to the fan motor by carefully detaching the connectors. Take note of their positions or take a photo for reference later, as this will make it easier to reconnect them correctly.
- Take out the old fan motor and replace it with a new one. Ensure that the new motor is compatible with your Frigidaire refrigerator model.
- Reconnect the wires to the new fan motor, making sure to match the correct positions based on your previous notes or the photo you took.
- Secure the new fan motor in place using the screws, clips, or bolts that you removed earlier.
- Plug the refrigerator back into the power source, turn it on, and listen for any abnormal noises. If the noise is gone, congratulations! You have successfully replaced the faulty fan motor.
Replacing Other Faulty Components
Noisy refrigerators can also be caused by other faulty components such as compressor fans, condenser coils, or defrost timers. Here’s a general guide on how to replace these components:
- Identify the specific component that is causing the excessive noise. Consult your Frigidaire refrigerator’s user manual or seek professional assistance if you’re unsure.
- Follow the safety precautions by turning off and unplugging the refrigerator.
- Locate the component that needs to be replaced. It may vary in position depending on your refrigerator model.
- Remove any screws, clips, or bolts holding the faulty component in place. Keep them safe for later use.
- Disconnect any wires or connectors attached to the component, ensuring that you remember their positions for reconnection.
- Replace the faulty component with a new one that is compatible with your Frigidaire refrigerator.
- Reconnect the wires or connectors to the new component, matching the correct positions based on your previous notes or photos.
- Secure the new component in place using the screws, clips, or bolts that you removed earlier.
- Plug the refrigerator back into the power source, turn it on, and listen for any unusual noises. If the noise has disappeared, you have successfully replaced the faulty part.
With these guidelines in mind, you can now confidently replace the faulty parts in your Frigidaire refrigerator. Remember to exercise caution and refer to your user manual when necessary. A well-maintained refrigerator will not only run more quietly but also ensure your food stays fresh for longer.
Inspecting And Clearing Drain Line
Steps To Inspect And Clear The Drain Line
Proper maintenance of your Frigidaire refrigerator is essential to ensure its optimal performance and prevent any potential issues. One crucial aspect of maintenance is inspecting and clearing the drain line. A clogged or blocked drain line can lead to water leaks and other problems, disrupting the overall functioning of your refrigerator.
In this section, we will guide you through the steps to inspect and clear the drain line effectively.
-
Locate The Drain Line
The first step is to locate the drain line. The drain line is typically located in the freezer compartment, behind the back wall, or at the bottom. Refer to your refrigerator’s user manual for specific instructions on locating the drain line.
-
Remove Any Visible Debris
Once you have located the drain line, inspect it for any visible debris or obstructions. Over time, food particles, dust, or ice can accumulate and clog the drain line. Use a soft brush or a cloth to gently remove any debris you can see. Be careful not to damage the drain line while cleaning.
-
Use A Mixture Of Warm Water And Vinegar
To thoroughly clean the drain line, create a mixture of warm water and vinegar. The acidity of vinegar helps break down any stubborn buildup inside the drain line. Pour the mixture into a squeeze bottle or a turkey baster.
-
Flush The Drain Line
Insert the nozzle of the squeeze bottle or turkey baster into the drain line opening. Squeeze the mixture into the drain line, applying gentle pressure. This will help flush out any remaining debris and clear the clog.
-
Test The Drain Line
After clearing the drain line, it’s important to test its functionality. Fill a small cup or container with water and pour it into the freezer compartment near the drain line. Observe if the water is draining properly through the drain line and into the evaporator pan located beneath the refrigerator.
A Common Cause Of Water Leaks
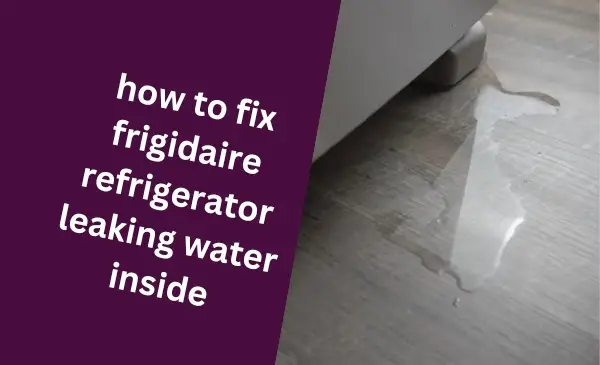
A clogged or blocked drain line is one of the most common culprits behind water leaks in Frigidaire refrigerators. When the drain line gets obstructed, the water that is supposed to drain into the evaporator pan will overflow and leak into the refrigerator or onto the floor. Recognizing this potential issue early on and promptly inspecting and clearing the drain line can prevent costly water damage and ensure the proper functioning of your refrigerator.
Checking And Replacing Defective Water Inlet Valve
A leaking refrigerator can be a frustrating issue to deal with, but it can often be traced back to a faulty water inlet valve. The water inlet valve is responsible for supplying the dispenser and ice maker with water, and when it malfunctions, it can lead to leaks and other problems.
In this section, we will guide you through the process of checking and replacing a defective water inlet valve in your Frigidaire refrigerator.
Instructions For Checking And Replacing A Faulty Water Inlet Valve
Step 1: Unplug the Refrigerator
The first step in addressing a faulty water inlet valve is to unplug the refrigerator from the power source. Safety should always come first when working with electrical appliances, so make sure to disconnect the power before proceeding with any repairs.
Step 2: Locate the Water Inlet Valve
To find the water inlet valve, you’ll need to access the rear panel of your Frigidaire refrigerator. Remove the lower back panel by unscrewing the screws or using a screwdriver, depending on your model. Once the panel is removed, you should be able to see the water inlet valve, which is usually located near the bottom of the fridge.
Step 3: Inspect for Visible Leaks
With the water inlet valve exposed, carefully inspect it for any visible leaks or cracks. If you notice any signs of damage, such as water dripping or pooling around the valve, it’s a clear indication that the valve needs to be replaced. Additionally, check for any loose or disconnected hoses that may be causing the issue.
Step 4: Test the Water Inlet Valve
To determine if the water inlet valve is functioning properly, you can perform a simple test. Disconnect the water supply line from the valve and place a container or towel under the valve to catch any water that may leak out. Then, plug in the refrigerator and activate the water dispenser or ice maker. If water continues to flow even when the dispenser is not in use, it means that the water inlet valve is faulty and needs to be replaced.
Step 5: Replace the Water Inlet Valve
Once you have confirmed that the water inlet valve is defective, it’s time to replace it. Begin by disconnecting any remaining hoses connected to the valve. Next, remove the mounting screws that secure the valve to the refrigerator. Carefully pull the valve away from the refrigerator and disconnect the electrical connectors.
Before installing the new water inlet valve, make sure to match the connections and align it properly with the mounting bracket. Reattach the hoses and secure the valve with the mounting screws, ensuring a tight fit. Finally, reconnect the water supply line and plug the refrigerator back into the power source to test the new valve for leaks.
Testing And Replacing Damaged Gaskets
Testing and replacing damaged gaskets is an essential step in troubleshooting a Frigidaire refrigerator. Damaged door gaskets can lead to water leaks, which not only affect the performance of your refrigerator but also increase your energy consumption.
In this section, we will go through the steps to test and replace these gaskets to ensure the optimal performance of your Frigidaire refrigerator.
Steps To Test And Replace Damaged Door Gaskets
1. Inspect The Gaskets
Start by visually inspecting the gaskets on all sides of the refrigerator door. Look for any signs of wear and tear, cracks, or gaps in the gaskets. Pay attention to areas where the gasket may be loose or not making a tight seal. Carefully examine the entire gasket, as even a small gap can cause significant issues.
2. Check For Proper Alignment
Ensure that the gaskets are properly aligned with the refrigerator door. Any misalignment can result in gaps and leaks. Gently tug on the gasket to see if it is securely attached to the door. If you notice any loose or misaligned areas, consider re-aligning them or adjusting the screws or clips that hold the gaskets in place.
3. Test The Gasket’s Seal
To test if the gasket is making a proper seal, close the refrigerator door on a piece of paper that is half in and half out of the fridge. If the gasket is sealing correctly, you should feel some resistance when pulling the paper out. If the paper slides out easily, this indicates that the gasket is not creating a tight seal and needs to be replaced.
4. Replace The Damaged Gaskets
If you find any issues with the gasket, it’s time to replace it. Start by ordering the correct gasket for your model of Frigidaire refrigerator. Once you have the new gasket, follow these steps to replace the damaged one:
- Open the refrigerator door and locate the screws or clips that hold the gasket in place.
- Using a screwdriver or your fingers, gently loosen the screws or release the clips to remove the old gasket.
- Carefully position the new gasket around the perimeter of the door, ensuring it is aligned properly.
- Tighten the screws or secure the clips to hold the new gasket in place.
5. Test The New Gasket
After replacing the gasket, it’s important to test its effectiveness. Repeat the paper test described in step 3 to ensure that the new gasket is creating a proper seal. If the paper offers resistance when being pulled out, the replacement was successful. If not, double-check the alignment and ensure that the gasket is securely attached.
By following these steps, you can easily test and replace damaged gaskets in your Frigidaire refrigerator. Ensuring that the gaskets are in optimal condition will not only prevent water leaks but also improve the overall performance and energy efficiency of your refrigerator. Don’t neglect this important maintenance task and keep your refrigerator running smoothly.
Adjusting Temperature And Airflow
In order to prevent freezing and ensure optimal performance of your Frigidaire refrigerator, it is important to monitor and adjust the temperature and airflow settings. By properly controlling these factors, you can maintain a consistent temperature inside the refrigerator, prolong the lifespan of your food, and minimize energy consumption.
Instructions On Adjusting Temperature
Controlling the temperature inside your Frigidaire refrigerator is crucial for keeping your food fresh and safe. Here are steps to adjust the temperature:
- Locate the temperature control: Depending on the model, you will find the temperature control knob or buttons either inside the refrigerator or on the control panel.
- Refer to the user manual: To ensure accurate temperature adjustments, consult the user manual specific to your Frigidaire refrigerator model. The manual will provide the recommended temperature range.
- Set the desired temperature: Turn the control knob or press the appropriate buttons to set the desired temperature. Ensure the temperature is in the optimal range for food storage.
- Monitor and adjust: After making adjustments, monitor the temperature inside the refrigerator using an appliance thermometer. If necessary, make further adjustments to maintain the desired temperature.
Instructions On Adjusting Airflow
Proper airflow inside your Frigidaire refrigerator helps maintain a consistent temperature throughout the unit and prevents certain areas from becoming overly cold or warm. Follow these steps to adjust the airflow:
- Organize food items: Properly arrange your food items inside the refrigerator, ensuring there is enough space between them to allow for adequate airflow. Avoid overcrowding the shelves and blocking the vents.
- Check the air vents: Locate the air vents inside your refrigerator. These vents are responsible for circulating air and maintaining a balanced temperature.
- Keep vents clear: Ensure that the vents are not blocked or obstructed by food items, packaging, or shelves. Obstructions can disrupt the airflow, leading to inconsistent temperatures.
- Adjust the shelving: If necessary, rearrange the shelves to allow for better airflow. Lower shelves tend to be cooler, while higher shelves have warmer temperatures. Adjusting the shelf positions can help distribute the cold air evenly.
By following these instructions and regularly monitoring the temperature and airflow settings, you can troubleshoot and prevent any issues related to temperature fluctuations or freezing in your Frigidaire refrigerator. Additionally, remember to defrost your freezer regularly to ensure proper airflow and maximize cooling efficiency.
Checking And Replacing Defective Defrost Timer
One of the potential causes of freezing issues in a Frigidaire refrigerator is a faulty defrost timer. The defrost timer plays a vital role in regulating the defrost cycle, ensuring that frost buildup is cleared away properly. If the defrost timer is defective, it can result in excessive frosting and even freezing of items in the refrigerator section.
In this section, we will provide guidance on how to check and replace a faulty defrost timer, helping you troubleshoot and resolve this common issue.
Guidance On Checking And Replacing A Faulty Defrost Timer
Checking and replacing a defective defrost timer is a relatively straightforward process that can be done without professional help. Here are the steps to follow:
- Unplug the refrigerator: Before you begin any repairs or inspections, always make sure to disconnect the refrigerator from the power source to prevent any electrical mishaps.
- Locate the defrost timer: The defrost timer can usually be found at the back of the refrigerator, behind the control panel or inside the temperature control housing. Consult your Frigidaire refrigerator’s user manual to determine the exact location.
- Observe the defrost cycle: Once you have located the defrost timer, observe the defrost cycle to determine if it is functioning properly. If the timer is causing the freezing issue, the defrost cycle may not be activating as it should.
- Replace the defective defrost timer: If you have determined that the timer is indeed faulty, it is time to replace it. Purchase a compatible replacement defrost timer and carefully remove the old one from its housing. Follow the instructions provided with the new timer to install it correctly.
- Test the refrigerator: After replacing the defrost timer, plug the refrigerator back into the power source and allow it to cool down. Monitor the temperature in the refrigerator section over the next few hours to ensure that the freezing issue has been resolved.
By following these simple steps, you can effectively troubleshoot and resolve freezing issues caused by a defective defrost timer in your Frigidaire refrigerator. Remember to always prioritize safety and consult professional help if you are unsure or uncomfortable performing any repairs.

Credit: www.amazon.com
Inspecting And Replacing Faulty Thermostat
If you’ve noticed that your Frigidaire refrigerator is constantly freezing your food, the problem may lie with a malfunctioning thermostat. The thermostat is responsible for regulating the temperature inside your fridge, ensuring that it stays at the desired level.
When this component starts to fail, it can cause freezing temperatures, leading to food spoilage and potential damage to your refrigerator’s other components.
In this section, we will explore the steps to inspect and replace a malfunctioning thermostat, helping you troubleshoot and resolve this issue.
Steps To Inspect And Replace A Malfunctioning Thermostat
If you suspect a faulty thermostat is causing your Frigidaire refrigerator to freeze, follow these steps to inspect and potentially replace the component:
- Unplug the Refrigerator: Before beginning any inspection or replacement work, always unplug the refrigerator’s power cord for safety purposes. This ensures that you won’t accidentally come into contact with live electrical components during the process.
- Locate the Thermostat: You can typically find the thermostat located at the rear of the fridge, near the control panel or temperature dial. Refer to your refrigerator’s manual or handbook for specific instructions on the location.
- Access the Thermostat: Depending on the make and model of your refrigerator, accessing the thermostat may require removing a cover or panel. Use a screwdriver or other appropriate tools to carefully remove any necessary components.
- Inspect the Thermostat: Once you have access to the thermostat, visually inspect it for any signs of damage, such as burnt or corroded wires or loose connections. Look for any obvious defects that may indicate a malfunctioning component.
- Test the Thermostat: To further assess the thermostat’s functionality, you can use a multimeter or a continuity tester. Following the manufacturer’s instructions, check the continuity of the thermostat by connecting the tester’s probes to the thermostat’s terminals. If the tester indicates an open circuit when the thermostat is set to the desired temperature, it may be faulty.
- Replace the Thermostat: If the inspection and testing confirm that the thermostat is malfunctioning, it will need to be replaced. Determine the specific replacement thermostat required for your model and purchase it from a reputable supplier. Follow the manufacturer’s instructions for installation, reconnect any wires, and ensure everything is properly secured before reassembling any covers or panels.
By following these steps, you can effectively inspect and replace a malfunctioning thermostat in your Frigidaire refrigerator, addressing the issue of freezing temperatures and ensuring the optimal performance of your appliance. Remember to always prioritize safety by unplugging the refrigerator before proceeding with any troubleshooting or repair work.
Frequently Asked Questions On How To Troubleshoot A Frigidaire Refrigerator
How Can I Fix A Frigidaire Refrigerator That Is Not Cooling Properly?
If your Frigidaire refrigerator is not cooling properly, first check if the temperature settings are correct. Clean the condenser coils and check for any obstructions in the air vents. If the issue persists, it could be due to a faulty compressor or a leak in the refrigerant.
In such cases, it is best to contact a professional technician for repair.
Why Is My Frigidaire Refrigerator Making Strange Noises?
Strange noises coming from your Frigidaire refrigerator could be a sign of various issues. Check if the refrigerator is level and on a stable surface. Inspect the condenser fan motor and the evaporator fan motor for any faults. Additionally, make sure there are no loose items or debris causing the noise.
If the problem persists, consider contacting a technician for further assistance.
How Do I Fix A Water Leak In My Frigidaire Refrigerator?
If your Frigidaire refrigerator is leaking water, start by checking the water line connections at the back. Ensure they are properly connected and not damaged. If the issue persists, inspect the water inlet valve and the defrost drain. Clear any blockages in the drain and replace the valve if necessary.
If the problem still persists, it is recommended to seek professional help.
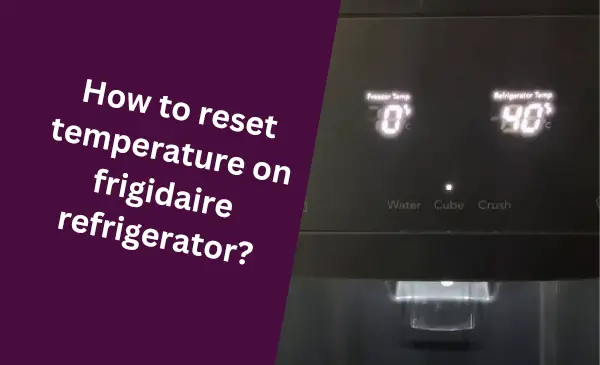
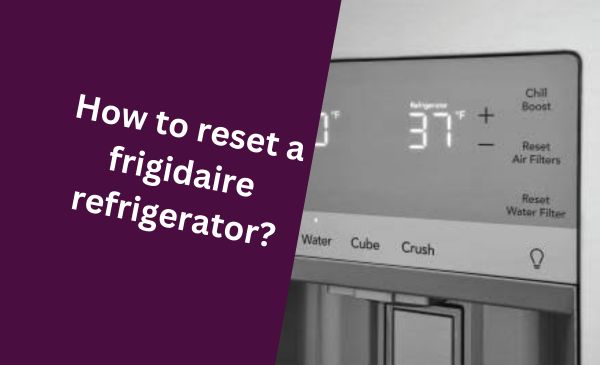
How Do I Reset The Control Panel On My Frigidaire Refrigerator?
To reset the control panel on your Frigidaire refrigerator, press and hold the “Freezer” and “Fresh Food” buttons simultaneously for a few seconds. This should reset the control panel and clear any error codes. If the issue continues, refer to your refrigerator’s user manual or contact Frigidaire customer support for further assistance.
Conclusion
Troubleshooting a Frigidaire refrigerator is a task that can be easily accomplished with the right knowledge and tools. By following the steps outlined you can diagnose and fix common problems like a pro. Remember to always prioritize safety and consult a professional if needed.
With a little patience and the right approach, you can keep your Frigidaire refrigerator running smoothly for years to come.
Hello Readers, I am Mechanic Shuvo, a seasoned refrigerator solution expert with over 11 years of hands-on experience in the field. Throughout my career, I've dedicated myself to understanding the ins and outs of refrigeration systems, honing my skills as a refrigerator mechanic. My passion for these appliances led me to create the website "refrigeratorsolutionsguide.com," where I aim to share my wealth of knowledge and expertise with others.
Over the years, I've encountered a wide range of refrigerator issues and have successfully resolved them all. From common problems like temperature fluctuations and strange noises to more complex technical issues, I've seen it all. Through my website, I hope to provide practical solutions, insightful tips, and guidance to help you keep your refrigerators running smoothly.