
To turn the cooling back on a Whirlpool refrigerator, locate the temperature control dial and adjust it to the desired temperature. After adjusting the temperature, wait for a few hours for the refrigerator to reach the set temperature and start cooling again.
Refrigerators are an essential appliance in any kitchen, but sometimes they may experience issues like the cooling system turning off. If you have a Whirlpool refrigerator and it stops cooling, you might be wondering how to get it back up and running.
Luckily, the solution is quite simple. By locating the temperature control dial and adjusting it to the desired temperature, you can reactivate the cooling function of your Whirlpool refrigerator. However, it is important to give the refrigerator some time to reach the set temperature after adjusting the dial.
In this guide, we will walk you through the steps to turn the cooling back on your Whirlpool refrigerator, ensuring your food stays fresh and your refrigerator functions optimally.
Common Causes Of Cooling Problems In Whirlpool Refrigerators
Whirlpool refrigerators are known for their reliable cooling capabilities. However, like any other appliance, they can experience cooling problems from time to time. Understanding the common causes of these issues can help you troubleshoot the problem and potentially avoid costly repairs.
Faulty Thermostat
A faulty thermostat is a common culprit when it comes to cooling problems in Whirlpool refrigerators. The thermostat is responsible for regulating the temperature inside the fridge, and if it becomes defective, it may not send the right signals to the cooling system.
This can result in inconsistent cooling or no cooling at all. If you notice that the temperature inside your refrigerator is not as cold as it should be, the thermostat could be the issue.
Clogged Condenser Coils
Clogged condenser coils can hinder the cooling process in your Whirlpool refrigerator. Over time, dust, dirt, and debris can accumulate on the coils, preventing proper heat transfer. When this happens, the refrigerator may struggle to cool efficiently or may not cool at all. Regularly cleaning the condenser coils can help prevent this issue and maintain optimal cooling performance.
Inadequate Airflow
Inadequate airflow within the refrigerator can also lead to cooling problems. When items are placed too close to the vents or the vents themselves are blocked, the cold air cannot circulate properly.
This can result in uneven cooling or warm spots within the refrigerator. To ensure proper airflow, it’s important to arrange items in the fridge in such a way that allows air to flow freely.
Malfunctioning Evaporator Fan
The evaporator fan is responsible for circulating cold air throughout the refrigerator. If the fan malfunctions, it may not distribute the cold air as intended. This can cause inconsistent cooling or even a complete loss of cooling. If you notice unusual noises or a lack of cold air, the evaporator fan may need to be inspected and replaced if necessary.
Damaged Door Gaskets
The door gaskets seal the refrigerator doors, preventing warm air from entering and cold air from escaping. If the gaskets are damaged, worn out, or not sealing properly, the refrigerator may struggle to maintain its cooling temperature.
This can lead to inefficient cooling and potential spoilage of food. Inspecting the door gaskets regularly and replacing them when necessary can help maintain the integrity of the cooling system.
By understanding these common causes of cooling problems in Whirlpool refrigerators, you can take appropriate steps to troubleshoot and resolve the issues.
However, if you’re unsure or unable to fix the problem on your own, it’s always best to consult a professional technician to ensure proper diagnosis and repair.
Checking And Adjusting The Thermostat
A properly functioning thermostat is essential for maintaining the ideal temperature in your Whirlpool refrigerator. If your refrigerator is not cooling as it should, it could be due to a misadjusted thermostat.
In this section, we will guide you through the process of checking and adjusting the thermostat to ensure optimal cooling efficiency.
Locating The Thermostat Control
The thermostat control is typically located inside the refrigerator compartment, at the rear, or on the side wall. It may be labeled as “Temperature Control” or simply “Thermostat”. Take a moment to familiarize yourself with the layout of your refrigerator and locate the thermostat control.
Setting The Thermostat To The Correct Temperature
Once you have located the thermostat control, it’s important to set it to the correct temperature for efficient cooling. The ideal temperature for most refrigerators is between 37 and 40 degrees Fahrenheit (2.8 and 4.4 degrees Celsius).
To adjust the thermostat, follow these steps:
- Turn the thermostat control knob or slide it to the desired temperature setting.
- Wait for a few hours to allow the refrigerator to reach the new temperature.
- Check the internal temperature with a reliable thermometer placed in a glass of water at the center of the refrigerator compartment.
- If the thermometer reads within the recommended range, the thermostat is successfully adjusted.
Testing The Thermostat For Accuracy
Periodically testing the thermostat for accuracy is crucial to ensure efficient cooling and prevent food spoilage. Here’s a simple step-by-step process for testing the thermostat:
- Fill a glass with ice cubes and add a small amount of water.
- Allow the glass to sit undisturbed for about 5 minutes to ensure the water reaches its coldest temperature.
- Place a reliable thermometer in the glass, making sure it is not touching the ice cubes.
- After a few minutes, check the thermometer reading. It should be close to 32 degrees Fahrenheit (0 degrees Celsius). If the reading is significantly higher or lower, the thermostat may need to be calibrated or replaced.
By following these easy steps, you can ensure that your Whirlpool refrigerator’s thermostat is accurately set, leading to optimal cooling performance. Regularly checking and adjusting the thermostat will help maintain the freshness and quality of the food stored in your refrigerator.
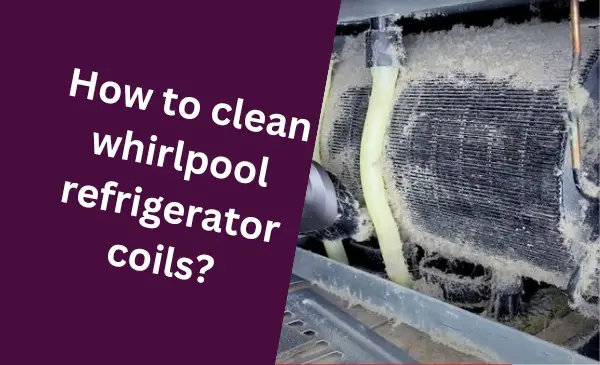
Cleaning The Condenser Coils For Improved Cooling
One of the key factors in maintaining optimal cooling performance in your Whirlpool refrigerator is by regularly cleaning the condenser coils. Over time, these coils can become clogged with dust, debris, and pet hair, hindering the refrigerator’s ability to cool effectively.
In this section, we will walk you through a step-by-step process of cleaning the condenser coils, allowing for improved cooling and energy efficiency.
Identifying The Location Of The Condenser Coils
The first step in cleaning the condenser coils is finding their exact location within your Whirlpool refrigerator. These coils are typically located at the back or bottom of the appliance, behind a grille or panel. Take a few moments to locate and access the condenser coils before proceeding to the cleaning process.
Gathering The Necessary Cleaning Supplies
Before you begin cleaning the condenser coils, gather the following cleaning supplies:
- A vacuum cleaner with a brush attachment
- A soft-bristle brush or refrigerator coil brush
- A microfiber cloth or a cleaning brush
- A flashlight (if needed to navigate dark areas)
Having these supplies ready will help to ensure a smooth and efficient cleaning process.
Removing Dust And Debris From The Coils
Once you have gathered your cleaning supplies, it’s time to remove the accumulated dust and debris from the condenser coils. Follow these steps:
- Step 1: Unplug the refrigerator from the power source to ensure safety.
- Step 2: Use a vacuum cleaner with a brush attachment to gently remove loose debris from the coils.
- Step 3: If there is stubborn dirt or grime, use a soft-bristle brush or refrigerator coil brush to gently scrub the coils in an up and down motion.
- Step 4: Use a microfiber cloth or a cleaning brush to wipe away any remaining dust or debris.
By diligently following these steps, you will effectively remove the built-up dust and debris, allowing the condenser coils to function optimally and improve cooling efficiency.
Using A Vacuum Or Brush To Clean Hard-to-reach Areas
While cleaning the condenser coils, pay special attention to hard-to-reach areas that may accumulate dust and debris. This includes areas around the compressor and any crevices within the coils. To effectively clean these areas:
- Step 1: Attach a narrow brush attachment to your vacuum cleaner or use a soft-bristle brush to reach into tight spaces.
- Step 2: Gently vacuum or brush these hard-to-reach areas to remove any dust or debris that may be restricting airflow.
Cleaning The Condenser Fan, If Applicable
In some Whirlpool refrigerators, there may be a condenser fan located near the condenser coils. It is important to clean this fan to ensure proper cooling and airflow. Follow these steps if your refrigerator has a condenser fan:
- Step 1: Refer to your refrigerator’s manual to locate the condenser fan.
- Step 2: Use a vacuum cleaner with a brush attachment or a soft-bristle brush to gently clean the fan blades and remove any dust or debris.
- Step 3: Wipe down the fan with a microfiber cloth or a cleaning brush to ensure it is completely clean.
Regularly cleaning the condenser fan will support better cooling performance and prevent any potential airflow blockages.
By dedicating time to cleaning the condenser coils and fan of your Whirlpool refrigerator, you can significantly improve cooling efficiency and extend the lifespan of your appliance. Incorporate this maintenance routine into your refrigerator care, and enjoy optimized cooling for years to come.

Credit: www.elevate.in
Ensuring Adequate Airflow In The Refrigerator
A crucial aspect of maintaining the optimal performance of your Whirlpool refrigerator is ensuring adequate airflow inside. When the airflow is restricted, it can lead to cooling issues and affect the overall efficiency of the appliance.
In this section, we will discuss some practical steps to ensure proper airflow in your refrigerator.
Checking For Obstructions In The Air Vents
One of the first things you need to do is check for any obstructions in the air vents. These vents are responsible for allowing cool air to circulate throughout the refrigerator. If they are blocked or clogged with debris, it can disrupt the airflow and cause cooling problems. To check for obstructions, follow these steps:
- Locate the air vents inside your Whirlpool refrigerator.
- Inspect the vents visually to see if there are any visible blockages.
- Carefully remove any obstacles such as incorrectly placed food containers, packaging materials, or ice buildup that might be obstructing the vents.
Rearranging Items To Allow Proper Airflow
The arrangement of items inside the refrigerator plays a significant role in ensuring proper airflow. When the refrigerator is overfilled or items are haphazardly placed, it can impede the circulation of cool air. To arrange items for optimal airflow, consider the following tips:
- Leave enough space between the items, allowing air to flow freely.
- Avoid placing tall or large items in front of the air vents.
- Store food items in a way that does not block the airflow, ensuring even distribution of cool air throughout the refrigerator.
Avoiding Over-stuffing The Refrigerator
While it may be tempting to cram the refrigerator with as many items as possible, over-stuffing can hinder proper airflow. When the refrigerator is excessively packed, it becomes difficult for air to circulate freely, leading to cooling problems. Follow these guidelines to prevent over-stuffing:
- Regularly remove any expired or unnecessary items from the refrigerator.
- Avoid overcrowding the shelves and drawers; allow some space for air to move around.
- If needed, consider shifting some items to other storage spaces, like the pantry or a secondary refrigerator.
Cleaning Or Replacing The Air Diffuser, If Needed
The air diffuser is responsible for regulating the flow of cold air into different sections of the refrigerator. If the air diffuser is dirty or malfunctioning, it can disrupt the airflow balance and impact the refrigerator’s cooling capabilities. To clean or replace the air diffuser, follow the steps below:
- Remove the air diffuser cover according to the manufacturer’s instructions.
- Clean the air diffuser thoroughly using a mild detergent and warm water.
- Inspect the diffuser for any signs of damage or wear.
- If necessary, replace the air diffuser with a compatible part from the manufacturer.
By checking for obstructions in the air vents, rearranging items for proper airflow, avoiding over-stuffing, and cleaning or replacing the air diffuser if needed, you can ensure adequate airflow in your Whirlpool refrigerator.
These simple steps will help keep your refrigerator running smoothly and efficiently, maintaining the freshness and longevity of your food items.
Troubleshooting And Fixing A Faulty Evaporator Fan
One common issue that can cause your Whirlpool refrigerator to stop cooling properly is a faulty evaporator fan. The evaporator fan is responsible for circulating the cold air throughout the refrigerator, ensuring that the items inside stay cool and fresh. If this fan stops working, it can lead to warm temperatures in the refrigerator compartment.
In this section, we will guide you through the process of troubleshooting and fixing a faulty evaporator fan to get your Whirlpool refrigerator cooling properly again.
Locating The Evaporator Fan In The Refrigerator
The first step in troubleshooting a faulty evaporator fan is to locate the fan inside your Whirlpool refrigerator. The evaporator fan is typically located in the freezer compartment, behind the back panel.
To access it, you will need to remove any food and shelves in the freezer and then remove the screws or clips holding the back panel in place.
Checking For Blockages Or Ice Buildup Around The Fan
Once you have removed the back panel, visually inspect the evaporator fan for any blockages or ice buildup. Blockages can occur due to food items or debris getting stuck in the fan blades, while ice buildup can occur due to a malfunctioning defrost system. Use a flashlight if needed to get a clear view of the fan.
If you notice any blockages or excessive ice buildup, carefully remove them using a soft cloth or a hairdryer set on the lowest heat setting to melt the ice.
Testing The Fan For Proper Functionality
After clearing any blockages or ice buildup, it’s time to test the evaporator fan for proper functionality. You can do this by manually spinning the fan blades with your hand. The fan blades should rotate freely and without any resistance.
If you notice any grinding or difficulty in rotating the fan blades, it indicates that the fan motor may be faulty and needs to be replaced.
Replacing The Fan If It Is Not Working Properly
If the evaporator fan is not working properly even after clearing any blockages and testing the blades, it is likely that the fan motor has failed and needs to be replaced. To replace the fan, first, ensure that you have the correct replacement part specific to your Whirlpool refrigerator model.
Follow the manufacturer’s instructions provided with the new fan to disconnect the old fan and install the new one in its place. Remember to turn off the power to the refrigerator before starting any repairs or replacements.
Fixing a faulty evaporator fan is crucial to maintaining optimal cooling performance in your Whirlpool refrigerator. By following the troubleshooting steps outlined above, you can identify and resolve any issues with the fan, ensuring that your refrigerator continues to keep your food fresh and cool.
Replacing Damaged Door Gaskets For Proper Sealing
Inspecting The Door Gaskets For Wear And Tear
One common reason for cooling issues in your Whirlpool refrigerator is damaged door gaskets. These gaskets are responsible for creating a tight seal when the doors are closed, preventing warm air from entering and cold air from escaping.
Over time, the door gaskets may wear out or become damaged, compromising the refrigerator’s ability to maintain a proper temperature. To ensure optimal cooling, it’s important to regularly inspect the door gaskets for wear and tear.
Removing The Damaged Gaskets
If you notice any signs of wear or damage on the door gaskets, it’s crucial to replace them promptly. Fortunately, replacing the damaged gaskets is a relatively simple task that can be done in a few steps.
First, open the refrigerator doors and locate the screws that secure the gaskets in place. Use a screwdriver to carefully loosen and remove these screws. Once the screws are removed, gently pull the damaged gaskets away from the door. Take note of how the gaskets are positioned, as this will help during the installation process.
Installing New Gaskets For A Tight Seal
With the old gaskets removed, it’s time to install the new ones for a tight and proper seal. Start by aligning the new gaskets with the slots on the refrigerator doors, ensuring that they are positioned correctly.
Carefully press the gaskets into place, securing them with the screws that you had previously removed. Tighten the screws until the gaskets are securely attached but be cautious not to overtighten them as it may damage the gaskets.
Once the new gaskets are installed, close the refrigerator doors and check if they are properly aligned and sealed tightly.
Testing The Doors To Ensure Proper Closure
After replacing the damaged gaskets, it’s essential to test the doors to ensure they are closing properly and forming a tight seal. Open and close the doors several times, paying attention to any resistance or air leakage.
If you feel any resistance or notice cold air escaping, double-check the gaskets’ positioning and tighten the screws if necessary. Proper closure of the doors is essential for the refrigerator’s efficiency and cooling performance.
By inspecting the door gaskets for wear and tear, replacing the damaged gaskets, and ensuring proper closure, you can maintain a tight seal on your Whirlpool refrigerator.
This will help keep the cool air inside and prevent warm air from entering, allowing your refrigerator to cool efficiently. Don’t overlook the importance of these simple steps in maintaining the performance of your refrigerator.
Frequently Asked Questions For How To Turn Cooling Back On Whirlpool Refrigerator
How Do I Turn The Cooling Back On My Whirlpool Refrigerator?
To turn the cooling back on your Whirlpool refrigerator, locate the temperature control dial either inside the fridge or on the exterior panel. Turn the dial to the desired cooling setting, usually indicated by a range of numbers or a thermostat icon.
Allow the fridge some time to reach the new temperature before loading it with food.
Why Is The Cooling Off In My Whirlpool Refrigerator?
The cooling may be off in your Whirlpool refrigerator due to a few reasons. Check if the power cord is securely plugged in, if the circuit breaker is tripped, or if there is a malfunction with the temperature control.
Additionally, ensure that the fridge vents are unobstructed and that the condenser coils are clean for proper cooling operation.
How Can I Fix A Whirlpool Refrigerator With No Cooling?
If your Whirlpool refrigerator is not cooling, first check the temperature controls to ensure they are set correctly. Next, clean the condenser coils to remove any dust or debris that may be affecting cooling.
If the issue persists, check the evaporator fan motor and the compressor for any malfunctions and consider contacting a professional appliance repair service.
Conclusion
To conclude, this step-by-step guide on how to turn the cooling back on your Whirlpool refrigerator ensures that you can quickly and easily troubleshoot any cooling issues. By following these simple instructions, you can ensure the optimal performance and longevity of your fridge, keeping your food fresh and your kitchen running smoothly.
Keep this guide handy for future reference, and never let cooling problems disrupt your daily routine again.
Hello Readers, I am Mechanic Shuvo, a seasoned refrigerator solution expert with over 11 years of hands-on experience in the field. Throughout my career, I've dedicated myself to understanding the ins and outs of refrigeration systems, honing my skills as a refrigerator mechanic. My passion for these appliances led me to create the website "refrigeratorsolutionsguide.com," where I aim to share my wealth of knowledge and expertise with others.
Over the years, I've encountered a wide range of refrigerator issues and have successfully resolved them all. From common problems like temperature fluctuations and strange noises to more complex technical issues, I've seen it all. Through my website, I hope to provide practical solutions, insightful tips, and guidance to help you keep your refrigerators running smoothly.