
The red H20 light on a Whirlpool refrigerator indicates that the water filter needs to be replaced. This light serves as a reminder to ensure the continued freshness and purity of the water dispensed by the refrigerator.
Whirlpool refrigerators are equipped with a water filter to remove impurities and contaminants from the water before it is dispensed. Over time, these filters can become clogged and less effective at filtering out the impurities. The red H20 light is a visual cue that it is time to replace the water filter.
This ensures that you continue to have clean and healthy drinking water. Replacing the filter is a simple process and can be done with ease.
Understanding The Red H20 Light
What The Red H20 Light Indicates
Understanding the red H20 light on your Whirlpool refrigerator can help you stay on top of potential issues and ensure your appliance continues to function smoothly. The red H20 light is an important indicator that alerts you to possible water-related problems that may affect your refrigerator’s performance. When this light turns on, it’s crucial to address the issue promptly to avoid any further complications.
Common Reasons For The Light To Turn On
Several common reasons can trigger the red H20 light on your Whirlpool refrigerator:
- Water Filter Replacement: One of the most common causes is the need to replace your water filter. Over time, the filter becomes clogged with impurities, reducing its effectiveness. When the red H20 light turns on, it’s a strong indication that it’s time to replace the water filter. Regularly replacing the filter not only ensures clean and fresh water but also improves the overall performance of your refrigerator.
- Water Supply Issues: Another reason for the red H20 light to illuminate is water supply issues. Insufficient or interrupted water flow can impact the refrigerator’s ability to dispense water or produce ice. Check if the water supply valve is fully open and if there are any kinks or leaks in the water line that may be causing the problem.
- Freezer Temperature: The red H20 light might also indicate a problem with the freezer temperature. If the temperature rises above the recommended range, it can lead to ice melting and water pooling, triggering the light to turn on. Ensure that the freezer temperature is set correctly and that the door is sealing properly.
- Defective Components: Occasionally, the red H20 light may be a result of a defective component within the refrigerator. Faulty sensors, valves, or connections can cause the light to activate even when there is no immediate water-related issue. In such cases, it’s best to consult a professional technician to diagnose and resolve the problem.
Importance Of Addressing The Issue Promptly
Addressing the issue indicated by the red H20 light promptly is crucial for several reasons:
- Preserving Food Safety: A malfunctioning water system can affect the refrigerator’s ability to maintain proper temperature levels. This can put your stored food at risk of spoilage, potentially compromising your family’s health. Quickly identifying and resolving the problem ensures that your food remains safe to consume.
- Preventing Water Damage: Ignoring the red H20 light can lead to water-related damage in and around your refrigerator. Leaks or excessive condensation can cause mold growth, damage to flooring, and even structural issues. By addressing the issue promptly, you can prevent costly repairs and maintain the overall integrity of your kitchen.
- Extending Appliance Lifespan: Timely troubleshooting and resolving the issue indicated by the red H20 light can extend the lifespan of your refrigerator. By taking care of any water-related problems promptly, you can ensure that all components work optimally, reducing the risk of further damage and the need for premature replacement.
Remember, a simple red H20 light can provide vital information about your Whirlpool refrigerator’s health and functionality. By being attentive to the indicator and taking appropriate action, you can enjoy a reliable and efficient appliance for years to come.
Checking Water Supply And Filters
In order to keep your Whirlpool refrigerator running smoothly and maintaining the highest quality of water, it is essential to regularly check the water supply and filters. One common indicator that may catch your attention is the red H20 light blinking on your refrigerator. This light serves as a quick visual cue that something may be obstructing the water flow or that it’s time to replace the filters.
In this section, we will guide you through the steps to inspect the water supply line, check and replace filters, and ensure proper water pressure to address any issues with the red H20 light.
Inspecting The Water Supply Line
The first step in resolving the red H20 light issue on your Whirlpool refrigerator is to inspect the water supply line. This line carries water from your main water supply to the refrigerator’s water dispenser and ice maker. Here’s how you can check the water supply line:
- Locate the water supply line connection at the back of your refrigerator.
- Ensure that the water supply valve is fully open.
- Inspect the water supply line for any kinks, twists, or cuts.
- If you notice any damage, carefully replace the water supply line with a new one.
How To Check And Replace Filters
Filters play a vital role in maintaining the quality and taste of the water dispensed by your refrigerator. Over time, they can become clogged and lose their effectiveness, leading to the red H20 light turning on. Here’s how you can check and replace your filters:
- Identify the location of the filters in your Whirlpool refrigerator. This information can usually be found in the user manual.
- Remove the old filter by following the manufacturer’s instructions.
- Inspect the filter for any signs of discoloration or debris accumulation.
- If the filter appears dirty or has been in use for over six months, it’s time to replace it.
- Ensure the new filter is properly installed, following the arrows or alignment indicators.
Ensuring Proper Water Pressure
Inadequate water pressure can also trigger the red H20 light on your Whirlpool refrigerator. To prevent this issue, you can take the following steps to ensure proper water pressure:
- Check the water pressure from your main water supply. It should be between 30 and 120 psi.
- If the water pressure is below the recommended range, contact a professional plumber to address the issue.
- Ensure there are no kinks or obstructions in the water supply line that could affect water pressure.
By regularly inspecting the water supply line, checking and replacing filters, and ensuring proper water pressure, you can troubleshoot the red H20 light on your Whirlpool refrigerator. Following these steps will help maintain a consistent flow of clean and refreshing water for all your needs.
Troubleshooting Ice Maker Issues
Having a reliable ice maker is essential for keeping your beverages cool and refreshing. However, if you’ve noticed the red H20 light on your Whirlpool refrigerator, it’s a signal that something might be amiss with your ice maker. In this section, we’ll dive into troubleshooting common ice maker problems and outline steps to resolve them. Let’s get started!
Examining The Ice Maker Components
Before we move into troubleshooting specific issues, it’s important to have a solid understanding of the different components of your Whirlpool refrigerator’s ice maker. Examining these parts can help you identify the source of the problem more efficiently. Here are the key components:
- Water supply line: This line carries water to the ice maker.
- Water inlet valve: The valve controls the flow of water into the ice maker and can be a common culprit for issues.
- Ice mold thermostat: This thermostat regulates the ice-making process, ensuring the ice is formed properly.
- Ice maker assembly: The assembly includes the motor, gears, and other mechanisms responsible for producing and dispensing ice.
Understanding these components will assist you in troubleshooting specific problems, so keep these in mind as we move forward.
Resolving Common Ice Maker Problems
Now that you’re familiar with the ice maker’s components, let’s dive into some common problems you may encounter and how to resolve them:
| Problem | Solution |
| The ice maker is not making ice | 1. Check the water supply line and ensure it is not kinked or blocked. 2. Inspect the water inlet valve for any damage or clogs. 3. Verify that the ice mold thermostat is functioning correctly. 4. Examine the ice maker assembly for any signs of damage or malfunction. 5. If all else fails, contact a professional technician for further assistance. |
| The ice cubes are too small or misshapen | 1. Check the water inlet valve and ensure it is fully open. 2. Inspect the water pressure; it should be between 40 and 120 psi. 3. Clean the ice mold tray if it has any mineral deposits or debris. 4. Verify that the ice mold thermostat is calibrated correctly. |
| The ice dispenser is not working | 1. Make sure the ice maker is turned on and connected to a power source. 2. Check if the ice dispenser switch is activated. 3. Inspect the dispenser motor and gears for any damage. 4. Verify that the dispenser chute is clear of ice blockages. 5. If the issue persists, reach out to a qualified technician for assistance. |
Resetting The Ice Maker
If you’ve tried troubleshooting and none of the above solutions have resolved the issue, it may be time to reset the ice maker. Resetting can often fix minor glitches and get your ice maker back to working order. Here’s how you can reset your Whirlpool refrigerator’s ice maker:
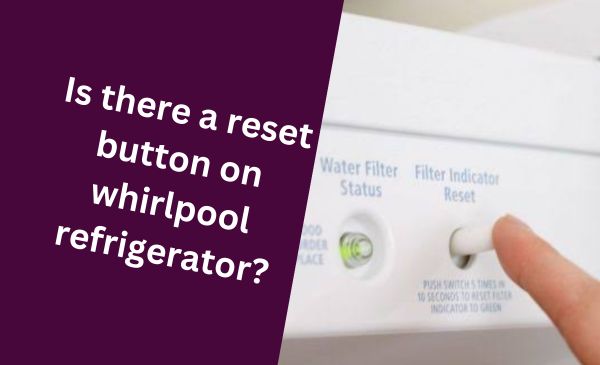
- Locate the reset button on your ice maker. It is usually situated near the ice mold assembly.
- Press and hold the reset button for approximately 10 seconds.
- Wait for the ice maker to complete a cycle, and then check if the problem is resolved.
If the red H20 light persists or the ice maker continues to malfunction, it may be time to seek professional assistance from a Whirlpool technician.
By understanding the components, troubleshooting common problems, and knowing how to reset the ice maker, you’ll be well-equipped to resolve any ice maker issues you may encounter with your Whirlpool refrigerator.

Credit: www.amazon.com
Diagnosing Water Dispenser Problems
Assessing The Water Dispenser System
If you notice that the red H20 light on your Whirlpool refrigerator is illuminated, it’s likely that there is a problem with your water dispenser. Diagnosing the issue promptly will help you get your drinking water flowing again. Here are a few steps to help you assess the water dispenser system:
- Check the water supply: Start by examining the water supply line connected to your refrigerator. Ensure that it is properly connected and that the water valve is turned on. A loose or disconnected water supply line can cause the red H20 light to come on.
- Inspect the water filter: Remove the water filter and inspect it for any clogs or debris. A clogged water filter can impede water flow and trigger the red H20 light. Replace the filter if necessary, following the manufacturer’s instructions.
- Examine the water inlet valve: The water inlet valve regulates the flow of water into your refrigerator. If it’s malfunctioning or clogged, it can lead to water dispenser problems. Inspect the valve for any signs of damage or debris, and replace it if needed.
- Check the dispenser control board: The dispenser control board controls various functions of the water dispenser. If it’s faulty or damaged, it may cause the red H20 light to stay on. Inspect the control board for any visible signs of damage or loose connections. If necessary, consult a professional technician to replace the control board.
By thoroughly assessing each component of the water dispenser system, you can pinpoint the cause of the red H20 light and take appropriate action to resolve the issue.
Fixing Leaks And Drips
If you’re experiencing leaks or drips from your water dispenser, they can cause inconvenience and potential damage to your refrigerator. Here are some steps to help you fix these issues:
- Inspect the water tubing: Check the water tubing connected to your refrigerator for any cracks, kinks, or disconnections. Replace any damaged tubing to prevent leaks.
- Check the dispenser nozzle: The dispenser nozzle can sometimes become clogged or damaged, leading to leaks. Clean the nozzle using a small brush or toothpick to remove any debris. Replace the nozzle if necessary.
- Examine the water inlet valve: A faulty or worn-out water inlet valve can cause leaks. Inspect the valve for any signs of damage or wear. Replace it if needed.
By addressing leaks and drips promptly, you can prevent water damage and ensure the efficient operation of your water dispenser.
Addressing Slow Or No Water Flow
If your Whirlpool refrigerator’s water dispenser is providing a slow or no water flow, addressing this issue will help you get back to enjoying refreshing drinks. Follow these steps to troubleshoot:
- Check the water pressure: Low water pressure can result in a weak water flow. Make sure that the water supply to your refrigerator has sufficient pressure. Consult a plumber if you suspect a problem with your home’s water pressure.
- Inspect the water filter: A clogged or overdue water filter can restrict water flow. Remove the filter and replace it with a new one if needed.
- Examine the water inlet valve: A malfunctioning water inlet valve can restrict water flow to the dispenser. Inspect the valve for any issues and replace it if necessary.
- Check for frozen water lines: Cold temperatures can cause water lines to freeze, obstructing water flow. Locate the water lines behind your refrigerator and thaw them using a hairdryer or by adjusting the temperature in your kitchen.
By addressing slow or no water flow, you can ensure that your Whirlpool refrigerator’s water dispenser is operating at its optimal capacity.
Calling For Professional Help
Calling for Professional Help
If you notice a red H20 light illuminated on your Whirlpool refrigerator, it may be an indication of a problem with the water supply or filtration system. While some issues can be resolved easily, others may require the expertise of a qualified technician.
In this section, we will discuss when it is necessary to seek assistance from a professional, how to find authorized service providers, and the importance of understanding your warranty coverage.
When To Seek Assistance From A Qualified Technician
If you have tried troubleshooting the issue with your Whirlpool refrigerator and the red H20 light continues to stay illuminated, it is recommended to call for professional help. An experienced technician will have the knowledge and expertise to diagnose and resolve complex issues that may be causing the red H20 light to appear.
Finding Authorized Service Providers
It is crucial to ensure that you contact authorized service providers for Whirlpool refrigerator repairs. These professionals are trained specifically to work on Whirlpool appliances and have access to genuine parts and tools. To find authorized service providers in your area, you can visit the official Whirlpool website and use their service locator tool.
Simply enter your zip code, and a list of authorized technicians near you will be provided.
Understanding Warranty Coverage
Before contacting a professional for assistance, it is important to understand the warranty coverage for your Whirlpool refrigerator. Different components of the appliance may have varying warranty periods, so it is essential to check the documentation that came with your appliance. Knowing your warranty coverage will help you determine if the issue you are experiencing is covered and if you are eligible for free repairs or replacements.
Furthermore, being aware of the warranty coverage will also help you avoid unnecessary expenses by ensuring that you do not attempt to repair the appliance yourself, potentially voiding the warranty in the process.
In summary, when the red H20 light appears on your Whirlpool refrigerator, it is crucial to assess the situation and decide if professional help is required. By finding authorized service providers and understanding your warranty coverage, you can ensure that your Whirlpool refrigerator is repaired by qualified technicians and minimize any potential expenses. Act promptly and seek professional assistance to address the issue efficiently.
Conclusion
To wrap it up, understanding the significance of the red H20 light on your Whirlpool refrigerator is essential for maintaining its optimal functioning. This indicator can signal potential issues with the water filter or water supply, reminding you to take prompt action.
By paying attention to this warning light, you can ensure the longevity and efficiency of your appliance, ultimately enhancing your overall kitchen experience.
Hello Readers, I am Mechanic Shuvo, a seasoned refrigerator solution expert with over 11 years of hands-on experience in the field. Throughout my career, I've dedicated myself to understanding the ins and outs of refrigeration systems, honing my skills as a refrigerator mechanic. My passion for these appliances led me to create the website "refrigeratorsolutionsguide.com," where I aim to share my wealth of knowledge and expertise with others.
Over the years, I've encountered a wide range of refrigerator issues and have successfully resolved them all. From common problems like temperature fluctuations and strange noises to more complex technical issues, I've seen it all. Through my website, I hope to provide practical solutions, insightful tips, and guidance to help you keep your refrigerators running smoothly.