Do you love having fresh, cold ice on hand for your drinks and recipes? If so, you know that an ice maker is a must-have appliance. But what if your ice maker isn’t working? Or what if you just got a new refrigerator and you’re not sure how to activate the ice maker?
Activating an ice maker can be tricky, especially if you’re not sure where to start. There are usually a few steps involved, and the process can vary depending on the make and model of your refrigerator.
In this guide, we’ll walk you through the steps involved in activating your ice maker, regardless of the make and model of your refrigerator. We’ll also provide some tips on troubleshooting common ice maker problems.
So if you’re ready to start enjoying fresh, cold ice again, read on to learn how to activate your ice maker.
Understanding Your Whirlpool Ice Maker
If you own a Whirlpool refrigerator with an ice maker, understanding how it works can help you troubleshoot any issues and ensure it is running smoothly. The ice maker is a convenient feature that provides you with a steady supply of ice cubes whenever you need them. In this article, we will explore the components of a Whirlpool ice maker and how it works in a Whirlpool refrigerator.
Components Of A Whirlpool Ice Maker
The Whirlpool ice maker consists of several key components that work together to produce ice cubes:
- Water supply valve: This valve controls the flow of water into the ice maker.
- Water fill tube: The water fill tube delivers water from the water supply valve to the ice maker’s water inlet valve.
- Water inlet valve: The water inlet valve is responsible for filling the ice maker’s mold with water.
- Ice mold: The ice mold is where the water is frozen into ice cubes. It has a heater element that helps release the ice cubes when they are ready.
- Ice ejector arm: Once the ice cubes are frozen, the ice ejector arm pushes them out of the ice mold and into the ice bin.
- Ice bin: The ice bin collects the ice cubes until they are ready to be dispensed.
How The Ice Maker Works In A Whirlpool Refrigerator
The ice maker in a Whirlpool refrigerator operates on a simple yet efficient process:
- Water supply: When you turn on the ice maker, the water supply valve allows water to flow into the ice maker’s water fill tube.
- Water fill: The water fill tube delivers the water to the water inlet valve, which opens to let the water fill the ice mold.
- Freezing: The water in the ice mold is frozen by the freezer’s cooling system, creating ice cubes.
- Harvesting: Once the ice cubes are frozen, the ice ejector arm rotates and pushes the ice cubes out of the mold and into the ice bin.
- Ice collection: The ice cubes are collected in the ice bin until you are ready to use them.
It’s important to note that the ice maker may need some time to produce a full bin of ice cubes, especially when it is first installed or after the refrigerator has been defrosted. Additionally, keep in mind that Whirlpool ice makers have different models and features, so it’s always a good idea to refer to the manufacturer’s manual for specific instructions on operating and maintaining your ice maker.
Preparing Your Whirlpool Refrigerator For Ice-Making
Before you can enjoy refreshing cold drinks with ice cubes straight from your Whirlpool refrigerator, you need to prepare it for ice making. This involves checking the installation, connecting the refrigerator to a water source, and adjusting the water pressure for optimal ice-making. Follow the steps below to get your ice maker up and running in no time.
Checking For Proper Installation
First and foremost, ensure that your Whirlpool refrigerator is properly installed. Improper installation can negatively affect the ice-making process. Here’s how you can check:
- Make sure that the refrigerator is level. Use a carpenter’s level to ensure that all sides are even.
- Check that the refrigerator is securely connected to a power source. Ensure that the power cord is plugged in and the outlet is functioning properly.
- Ensure that the ice maker is correctly installed in the freezer compartment. Refer to the refrigerator’s manual for specific instructions on how to install the ice maker.
Connecting The Refrigerator To A Water Source
For your Whirlpool refrigerator to make ice, it needs to be connected to a water source. Follow these simple steps:
- Locate the water supply line at the back of the refrigerator. It should be near the bottom.
- Turn off the water supply by twisting the shut-off valve clockwise.
- Connect one end of a water supply line to the shut-off valve and tighten it securely.
- Connect the other end of the water supply line to the refrigerator’s water inlet valve, usually located at the bottom rear of the unit. Make sure it is tightly connected.
- Turn on the water supply by twisting the shut-off valve counterclockwise. Verify that water is flowing through the line.
Adjusting The Water Pressure For Optimal Ice Making
The water pressure in your Whirlpool refrigerator is crucial for efficient ice-making. Follow these steps to ensure the water pressure is adjusted correctly:
- Locate the water pressure regulator on the refrigerator. It is typically found near the water inlet valve.
- Turn the adjustment screw clockwise to decrease the water pressure or counterclockwise to increase it. Start with the recommended pressure range specified in your refrigerator’s manual.
- Check the ice maker for proper operation after adjusting the water pressure. You should see ice cubes forming within a few hours.
By following these steps, you can prepare your Whirlpool refrigerator for ice-making and start enjoying ice-cold beverages whenever you want. Remember to consult your refrigerator’s manual for specific instructions and troubleshooting tips. Cheers to cool drinks!
Activating Your Whirlpool Ice Maker
The ice maker on your Whirlpool refrigerator can be a convenient and useful feature, providing you with a steady supply of ice whenever you need it. However, before you can start enjoying freshly made ice, you need to activate your Whirlpool ice maker and set it up according to your preferences.
In this section, we will guide you through the process of turning on your ice maker, setting the ice cube size, and allowing time for initial ice production.
Step 1: Turning On The Ice Maker
To turn on the ice maker, locate the power switch or button. This is usually located on the front or side of the ice maker, near the ice storage bin. Once you have located the switch or button, simply press it to turn on the ice maker. You should hear a gentle hum or buzzing sound, indicating that the ice maker is now activated. It’s important to note that the ice maker may take a while to start producing ice, so don’t be alarmed if you don’t see any ice immediately after turning it on.
Step 2: Setting The Ice Cube Size
If you prefer larger or smaller ice cubes, your Whirlpool refrigerator may allow you to adjust the ice cube size. To do this, look for the ice cube size selector. This is usually a small lever or switch located on the ice maker itself or on the control panel of the refrigerator.
Simply move the lever or switch to the desired setting, whether it’s for larger cubes, smaller cubes, or something in between. Once you have set the ice cube size, the ice maker will start producing ice according to your preference.
Step 3: Allowing Time For Initial Ice Production
After turning on the ice maker and setting the ice cube size, it’s important to allow enough time for the initial ice production. This is because the ice maker needs to fill the water reservoir and cool down before it can start producing ice effectively. Typically, it can take anywhere from 24 to 48 hours for the ice maker to reach optimal ice production. During this time, it’s important to avoid opening the freezer door frequently and to ensure that the water supply to the refrigerator is properly connected and turned on.
By following these simple steps, you can easily activate your Whirlpool ice maker and start enjoying an abundant supply of ice. Remember to give it some time for initial ice production and adjust the ice cube size according to your preference. With your ice maker up and running, you’ll never have to worry about running out of ice again!
Troubleshooting Common Issues With Your Whirlpool Ice Maker
No Ice Production
If your Whirlpool refrigerator’s ice maker is not producing any ice, there are a few possible causes to consider. First, check the power supply. Ensure that the refrigerator is properly plugged in and receiving electricity. If it is, then the ice maker may be turned off. Look for the ice maker switch, usually located on the control panel, and make sure it is in the “On” position.
Additionally, check the freezer temperature. The freezer should be set to around 0 degrees Fahrenheit (-18 degrees Celsius) for optimal ice production.
Checking Water Supply
A common issue with ice makers is a disrupted water supply. If the water supply is not properly connected, the ice maker will not be able to produce ice. Start by checking the water line connection at the back of the refrigerator. Ensure that the line is securely connected and not kinked or twisted.
If everything seems fine, turn off the water supply valve and then turn it back on to see if it resolves the issue. Make sure there is water flowing to the refrigerator by disconnecting the water line from the back of the refrigerator and dispensing water into a bucket or container.
Examining The Water Inlet Valve
The water inlet valve controls the flow of water into the ice maker. If it is not functioning properly, the ice maker may not be able to produce ice. Start by inspecting the water inlet valve for any signs of damage or clogs. You can also use a multimeter to test the valve for continuity. If the water inlet valve is faulty, it will need to be replaced.
Ice Cubes Not Dispensing Properly
If your ice maker is producing ice but the cubes are not dispensing properly, there may be an issue with the dispenser mechanism. First, check if there is any ice buildup in the dispenser chute. Clear any obstructions by using a plastic utensil to gently remove the ice buildup.
Next, inspect the ice dispenser motor or auger motor. These motors control the movement of the ice cubes through the dispenser. If the motors are not functioning properly, they may need to be replaced.
Inspecting The Ice Dispenser Chute
The ice dispenser chute is the pathway through which the ice cubes travel when being dispensed. It is important to regularly inspect the chute for any blockages or obstructions. If you notice any ice or debris blocking the chute, clear it away to ensure smooth ice cube dispensing. You can also use warm water to melt any ice buildup that may be obstructing the chute.
Maintaining And Cleaning Your Whirlpool Ice Maker
Your Whirlpool refrigerator’s ice maker is a handy feature that provides you with a constant supply of fresh ice. To ensure its smooth operation and longevity, regular maintenance and cleaning are essential.
Cleaning The Ice Bin And Ice Scoop
Over time, the ice bin and ice scoop can accumulate dirt, minerals, and other impurities. Regular cleaning helps keep your ice maker hygienic and ensures the quality of the ice it produces. Follow these simple steps to clean the ice bin and ice scoop:
- Start by unplugging your refrigerator or turning off the power to the ice maker.
- Remove the ice bin from the freezer compartment. Empty any remaining ice and discard it.
- Wash the ice bin and ice scoop with warm, soapy water. Use a sponge or cloth to remove any residue.
- Rinse thoroughly to remove any soap residue.
- Dry the ice bin and ice scoop with a clean towel.
- Reassemble the ice bin and place it back into the freezer compartment.
- Plug in your refrigerator or turn the power to the ice maker back on.
Removing And Replacing The Ice Maker’s Water Filter
The water filter in your ice maker is responsible for removing impurities from the water that is used to make ice. Over time, the filter can become clogged or lose its effectiveness. Here’s how you can remove and replace the water filter:
- Locate the water filter. It is usually located behind the base grille or inside the refrigerator compartment.
- Turn off the ice maker or unplug the refrigerator.
- Twist the old water filter counterclockwise to remove it.
- Take the new water filter and remove any protective caps or covers.
- Insert the new water filter into the filter housing and twist it clockwise until it locks into place.
- Turn on the ice maker or plug in the refrigerator.
Regular Maintenance Tips To Ensure Optimal Performance
Keeping your Whirlpool ice maker in top condition requires regular maintenance. Here are some tips to ensure optimal performance:
- Check the water supply line periodically to make sure it is not kinked or obstructed.
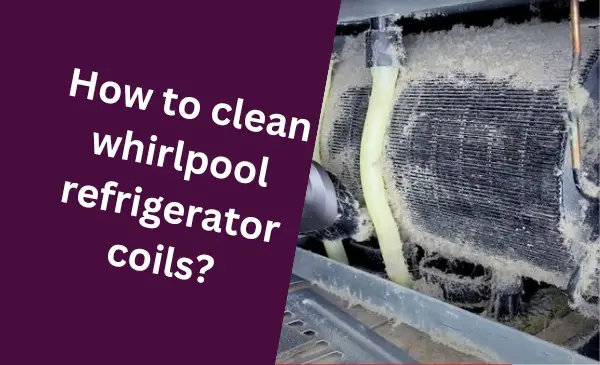
- Clean the condenser coils at least once a year to remove dust and debris that may inhibit cooling efficiency.
- Inspect the ice maker for any signs of damage or leaks and replace any faulty parts promptly.
- Keep the area around the ice maker clean and clear to allow proper airflow.
- Refer to your refrigerator’s user manual for specific maintenance instructions.
By following these simple steps and regular maintenance tips, you can keep your Whirlpool ice maker clean, and efficient, and produce high-quality ice for all your refreshing beverages. Cheers to ice-cold convenience!
Frequently Asked Questions For How To Turn Ice Maker On Whirlpool Refrigerator
How Do I Turn On The Ice Maker On My Whirlpool Refrigerator?
To turn on the ice maker on your Whirlpool refrigerator, locate the ice maker switch or lever inside the freezer compartment. Flip the switch or slide the lever to the “On” position. Give the ice maker a few hours to start producing ice, and you’ll be ready to enjoy chilled beverages in no time.
Can I Manually Turn On The Ice Maker On My Whirlpool Refrigerator?
Yes, you can manually turn on the ice maker on your Whirlpool refrigerator. Locate the ice maker control located inside the freezer compartment. Depending on the model, you might need to press a button or turn a knob to manually start the ice-making process.
Refer to your appliance’s user manual for specific instructions.
What Should I Do If My Whirlpool Refrigerator’s Ice Maker Is Not Working?
If your Whirlpool refrigerator’s ice maker is not working, try the following steps:
1. Check if the ice maker switch is in the “On” position.
2. Ensure that the water supply is connected and turned on.
3. Clear any ice blockages or jammed ice cubes.
4. Make sure the temperature in the freezer compartment is set correctly.
If the problem persists, contact Whirlpool customer service for further assistance.
How Long Does It Take For The Ice Maker On A Whirlpool Refrigerator To Start Producing Ice?
After turning on the ice maker on your Whirlpool refrigerator, it usually takes around 24 to 48 hours for the ice production to begin. This time frame allows the ice maker to cool and reach the appropriate temperature for ice production.
Be patient, and soon you’ll have a steady supply of ice for your convenience.
Conclusion
To wrap up, turning on the ice maker in your Whirlpool refrigerator is a simple process that can make your life more convenient. By following the steps mentioned in this blog post, you can enjoy a steady supply of ice whenever you need it.
Whether you’re hosting a party or just want some refreshing beverages, activating your ice maker will be a breeze. Remember to consult your refrigerator’s user manual for model-specific instructions.
Happy ice-making!
Hello Readers, I am Mechanic Shuvo, a seasoned refrigerator solution expert with over 11 years of hands-on experience in the field. Throughout my career, I've dedicated myself to understanding the ins and outs of refrigeration systems, honing my skills as a refrigerator mechanic. My passion for these appliances led me to create the website "refrigeratorsolutionsguide.com," where I aim to share my wealth of knowledge and expertise with others.
Over the years, I've encountered a wide range of refrigerator issues and have successfully resolved them all. From common problems like temperature fluctuations and strange noises to more complex technical issues, I've seen it all. Through my website, I hope to provide practical solutions, insightful tips, and guidance to help you keep your refrigerators running smoothly.


