
Is your Whirlpool refrigerator’s ice bin overflowing with ice, or is it frozen shut? If so, you may need to remove it to clean it or troubleshoot the problem. But don’t worry, removing an ice bin from a Whirlpool refrigerator is a quick and easy process.
While removing an ice bin from a Whirlpool refrigerator is a relatively easy task, some people may find it daunting, especially if they’ve never done it before. Additionally, if the ice bin is frozen shut, it can be difficult to remove without damaging it.
In this guide, we’ll walk you through the steps involved in easily removing an ice bin from a Whirlpool refrigerator, even if it’s frozen shut. We’ll also provide some tips on how to clean and maintain your ice bin to prevent problems from happening in the first place.
So if you need to remove the ice bin from your Whirlpool refrigerator, read on to learn how to do it easily and safely.
Understanding The Ice Bin In Whirlpool Refrigerators
The ice bin is an essential component of your Whirlpool refrigerator, designed to store and dispense ice cubes conveniently. By understanding how the ice bin works and knowing how to remove it correctly, you can avoid potential issues and ensure its smooth operation.
In this section, we will explore the key components of the ice bin and emphasize the importance of following the correct procedure for its removal.
Components Of The Ice Bin
The ice bin comprises several components that work together to form a functional unit:
- Ice storage compartment: This is the main area where the ice cubes are stored. It has a spacious design to accommodate a significant amount of ice.
- Auger: The auger is responsible for dispensing the ice cubes from the storage compartment. It rotates to transport the ice towards the dispenser chute.
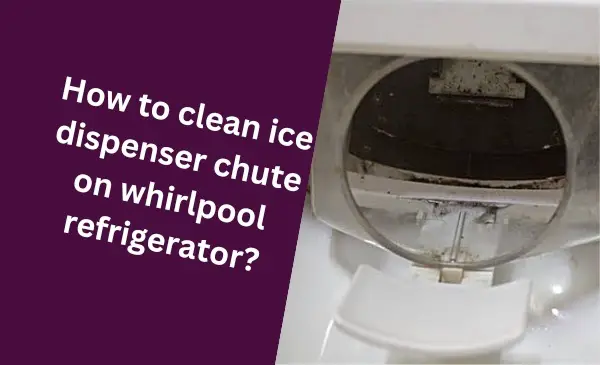
- Dispenser chute: The dispenser chute is the passage through which the ice cubes exit the ice bin and onto the dispenser. It directs the ice towards the glass or container for easy access.
These components work harmoniously to ensure a reliable supply of ice whenever needed. Now that we’ve covered the basic composition of the ice bin, let’s delve into the importance of removing it correctly.
Importance Of Removing The Ice Bin Correctly
Removing the ice bin correctly is crucial for several reasons:
- Preventing damage: When you remove the ice bin improperly, you risk damaging its components or other parts of the refrigerator. By following the correct procedure, you can prevent unnecessary breakage or wear and tear.
- Easier cleaning: As with any storage compartment, the ice bin requires periodic cleaning to ensure it remains hygienic. By removing it correctly, you can effortlessly access every nook and cranny of the ice bin, making the cleaning process more straightforward and effective.
- Addressing ice jams: In some instances, ice cubes may get stuck or jammed within the ice bin or dispenser chute. Removing the ice bin correctly allows you to examine the situation closely, identify the cause of the jam, and resolve it without causing further damage.
Understanding the significance of removing the ice bin correctly ensures the longevity of your Whirlpool refrigerator’s ice-making functionality. It helps maintain the overall performance and efficiency of the ice bin, allowing you to enjoy a steady supply of cold beverages without any concerns.
Tools Needed For Safe Ice Bin Removal
Removing the ice bin from your Whirlpool refrigerator may seem like a simple task, but having the right tools is essential for a safe and hassle-free experience. With the proper tools at your disposal, you can avoid damaging the refrigerator or injuring yourself.
In this section, we will discuss the essential tools you need to successfully remove the ice bin from your Whirlpool refrigerator.
Essential Tools For The Task
When it comes to removing the ice bin from your Whirlpool refrigerator, you don’t need a full toolbox. However, having a few essential tools can make the process much easier and more efficient. Here are the tools you need:
| 1. | Screwdriver |
| 2. | Container for ice storage |
| 3. | Protective gloves |
These three tools will ensure successful ice bin removal without any unnecessary strain or hassle. Let’s take a closer look at the importance of each tool.
Importance Of Having The Right Tools
- Screwdriver: The screwdriver is a must-have tool for removing the ice bin from your Whirlpool refrigerator. It is used to release the screws or bolts that hold the ice bin in place. Without a screwdriver, you won’t be able to disassemble the necessary components and safely remove the ice bin.
- Container for ice storage: While removing the ice bin, it’s important to have a container ready to store the ice. This ensures that you won’t lose any ice and allows for a smooth transition when you reinstall the bin. Having a designated container for ice storage prevents unnecessary mess and ensures you have ice available while cleaning or maintaining your refrigerator.
- Protective gloves: When working with appliances, safety should always be a priority. Protective gloves offer an extra layer of protection for your hands, reducing the risk of injury while removing the ice bin. They provide a firm grip and safeguard against any sharp edges or cold temperatures. Wearing protective gloves also prevents the transfer of dirt or bacteria from your hands to the ice bin or refrigerator.
By having these tools on hand, you can confidently remove the ice bin from your Whirlpool refrigerator without any hassle or risk. Remember, safety should always be your utmost priority when working with appliances. So, make sure to equip yourself with the essential tools and follow the appropriate guidelines to ensure a successful ice bin removal process.
Step-by-step Guide To Removing The Ice Bin
Removing the ice bin from your Whirlpool refrigerator may seem like a daunting task, but with the right guide, it can be a simple and hassle-free process. In this step-by-step guide, we will walk you through the necessary steps to safely remove the ice bin, while also providing you with some valuable tips to ensure the process goes smoothly.
Preparing The Refrigerator For Ice Bin Removal
Before you begin the process of removing the ice bin, it is important to prepare your refrigerator to minimize any potential damage. Follow these steps:
- Turn off the ice maker: Locate the switch or lever on your refrigerator that controls the ice maker and turn it off. This will prevent the ice maker from dispensing ice during the removal process.
- Empty the ice bin: Remove any ice cubes or frost from the bin to prevent any spills or messes during removal. You can either use the ice or transfer it to an alternative storage container.
Removing The Ice Bin Safely
Now that you have prepared the refrigerator, it’s time to remove the ice bin safely. Follow these steps:
- Locate the ice bin: Depending on your Whirlpool refrigerator model, the ice bin may be located in different areas. Refer to your refrigerator’s manual to find the exact location.
- Release the ice bin: Look for the release button or lever on the ice bin. Press or pull it to release the ice bin from its position.
- Gently pull out the ice bin: Once the ice bin is released, gently pull it out towards you. Be cautious of any attachments or wires that may be connected to the ice bin.
Tips For Handling The Ice Bin During Removal
Handling the ice bin properly during removal is crucial to avoid any mishaps or damage. Keep these tips in mind:
- Hold the ice bin with both hands: To maintain stability, use both hands to hold the ice bin firmly while removing it from the refrigerator.
- Avoid excessive force: Be gentle when pulling out the ice bin to avoid any accidental damage to the refrigerator or the ice bin itself.
- Place the ice bin on a stable surface: Once removed, place the ice bin on a stable surface to prevent it from accidentally tipping over and causing spills.
Preventing Damage To The Refrigerator During The Process
While removing the ice bin, it’s important to take precautions to prevent any damage to your refrigerator. Follow these guidelines:
- Do not force the ice bin: If the ice bin doesn’t come out easily, double-check for any additional release buttons or levers that may need to be activated before attempting to remove it again.
- Do not twist or tilt the ice bin: Avoid twisting or tilting the ice bin excessively, as this can damage the mechanism or cause ice and water to spill.
By following these steps and tips, you can safely and easily remove the ice bin from your Whirlpool refrigerator. Remember to consult your refrigerator’s manual if you need additional guidance specific to your model.
Troubleshooting Tips For Stuck Ice Bins
Common Issues With Stuck Ice Bins
Ice bins in Whirlpool refrigerators can sometimes get stuck, making it difficult to remove them for cleaning or maintenance. This can be frustrating, especially when you need to access the ice bin regularly. Below are some common issues that can cause ice bins to get stuck:
- Ice buildup: Over time, ice can accumulate around the edges of the ice bin, causing it to become stuck.
- Obstructed mechanism: The mechanism that secures the ice bin in place may become obstructed with debris, making it difficult to remove.
- Misaligned bin: If the ice bin is not properly aligned with the rails or brackets inside the refrigerator, it may become stuck.
How To Troubleshoot And Solve The Problem
If you’re facing the issue of a stuck ice bin in your Whirlpool refrigerator, don’t worry – there are a few troubleshooting steps you can take to resolve the problem:
Cleaning the ice chute and bin
The first step is to ensure that the ice chute and bin are free from any ice buildup or debris. Follow these steps to clean them:
- Disconnect the refrigerator from the power source or turn off the ice maker.
- Remove any ice cubes or loose ice from the bin.
- Using a mild soap solution or warm water, clean the ice chute and bin thoroughly.
- Inspect the ice chute for any obstructions and remove them carefully.
- Once cleaned, allow the ice chute and bin to dry completely before reinstalling.
Inspecting and realigning the bin
If cleaning the ice chute and bin doesn’t solve the issue, it’s possible that the bin may not be properly aligned. Follow these steps to inspect and realign the bin:
- Remove the ice bin from the refrigerator.
- Check the rails or brackets inside the refrigerator for any misalignment.
- If misalignment is detected, gently push or adjust the bin until it aligns properly.
- Slowly slide the bin back into the refrigerator, making sure it fits snugly. You should feel it click into place.
Seeking professional assistance
If the ice bin continues to be stuck even after cleaning and realigning, it may be best to seek professional assistance. Contact a certified Whirlpool technician who can diagnose and resolve any underlying issues with your refrigerator’s ice bin system.
Maintenance Tips To Prevent Ice Bin Issues
The ice bin in your Whirlpool refrigerator is an essential component that keeps your drinks chilled and refreshing. To ensure its smooth functionality and prevent future problems, regular cleaning and maintenance are crucial.
By following these maintenance tips, you can keep your ice bin in optimal condition, providing you with a continuous supply of ice for your everyday needs.
Regular Cleaning And Maintenance of the Ice Bin
Regularly cleaning your ice bin helps prevent the build-up of dirt, debris, and impurities that may affect the quality of the ice. Follow these steps to effectively clean your ice bin:
- Start by removing the ice bin from your Whirlpool refrigerator. Refer to your refrigerator’s user manual for specific instructions on how to remove the ice bin.
- Empty any remaining ice from the ice bin and discard it.
- Use warm water and mild dish soap to clean the ice bin. Avoid using harsh chemicals or abrasive cleaners, as they can damage the bin’s interior surface.
- Gently scrub the surfaces of the ice bin, including the walls, the ice chute, and the bottom. Pay extra attention to removing any stains or residue.
- Rinse the ice bin thoroughly with clean water to remove any soap residue. Ensure there are no remaining soap bubbles.
- Dry the ice bin completely before placing it back into your Whirlpool refrigerator.
By incorporating this simple cleaning routine into your regular maintenance schedule, you can keep your ice bin in optimal condition and ensure that the ice it produces is clean and free from any unwanted odors or flavors.
Preventing Future Problems With The Ice Bin
In addition to regular cleaning, there are a few preventive measures you can take to avoid future problems with your ice bin:
- Avoid overfilling the ice bin, as excessive ice can cause it to jam or hinder the ice-making process. Keep an eye on the ice level and remove any excess ice if necessary.
- Regularly check the ice bin for any ice clumps or obstructions. Use a spoon or a fork to break apart any large clumps that may have formed.
- Inspect the ice bin’s interior and exterior for any signs of damage or wear. Cracks or leaks can lead to inefficient ice production or water leakage. If you notice any damage, consider replacing the ice bin.
- Ensure that the ice bin is properly aligned and securely inserted into the refrigerator. Misalignment can disrupt the ice-making process and cause issues with dispensing ice.
By following these preventive tips, you can maintain the optimal functionality of your Whirlpool refrigerator’s ice bin and ensure a continuous supply of ice for all your cooling needs.
Frequently Asked Questions Of How To Remove Ice Bin From Whirlpool Refrigerator
How Do I Remove The Ice Bin From A Whirlpool Refrigerator?
To remove the ice bin from your Whirlpool refrigerator, simply pull the ice bin towards you. It should easily slide out of the freezer compartment. Make sure to hold the bin securely and not to tilt it too much to prevent any spilled ice.
Is It Necessary To Turn Off The Refrigerator Before Removing The Ice Bin?
No, it is not necessary to turn off the refrigerator before removing the ice bin. However, to avoid any accidents or spills, it is recommended to empty the ice bin or turn off the ice maker before removing it. This will prevent any ice from falling out or water from leaking.
Can I Clean The Ice Bin While It’s Removed From The Refrigerator?
Yes, you can clean the ice bin while it’s removed from the refrigerator. Simply wash the bin with warm soapy water and rinse thoroughly. Make sure to dry it completely before placing it back in the freezer. Avoid using abrasive cleaners or sharp objects that may damage the bin.
Conclusion
Removing the ice bin from your Whirlpool refrigerator is a simple process that can be done in a few easy steps. By following the guidelines and tips provided in this blog post, you can ensure a smooth and hassle-free ice bin removal experience.
Remember to handle the ice bin with care and follow the manufacturer’s instructions for best results. Keep your Whirlpool refrigerator running smoothly and enjoy the convenience of a well-maintained appliance.
Hello Readers, I am Mechanic Shuvo, a seasoned refrigerator solution expert with over 11 years of hands-on experience in the field. Throughout my career, I've dedicated myself to understanding the ins and outs of refrigeration systems, honing my skills as a refrigerator mechanic. My passion for these appliances led me to create the website "refrigeratorsolutionsguide.com," where I aim to share my wealth of knowledge and expertise with others.
Over the years, I've encountered a wide range of refrigerator issues and have successfully resolved them all. From common problems like temperature fluctuations and strange noises to more complex technical issues, I've seen it all. Through my website, I hope to provide practical solutions, insightful tips, and guidance to help you keep your refrigerators running smoothly.