
As the winter season approaches and temperatures begin to drop, it’s crucial to safeguard your appliances, including your Whirlpool refrigerator with an ice maker. Freezing temperatures can wreak havoc on your refrigerator’s plumbing system, leading to costly repairs or even permanent damage.
Winterizing your Whirlpool refrigerator with an ice maker is a simple yet essential process that involves draining any remaining water from the water lines and ice maker to prevent freezing and potential damage. This preventive measure ensures that your refrigerator remains functional and in top condition throughout the winter months.
In this comprehensive guide, we’ll walk you through the step-by-step process of winterizing your Whirlpool refrigerator with an ice maker, ensuring that your appliance is adequately prepared for the winter season. By following these instructions, you can protect your refrigerator from potential damage and enjoy uninterrupted use throughout the winter months.
Prep Your Refrigerator For Winter
Your refrigerator is an essential appliance that needs proper care and maintenance, especially during the winter months. Winterizing your refrigerator ensures that it functions efficiently and keeps your food fresh and safe.
In this section, we will guide you on how to winterize a Whirlpool refrigerator with an ice maker. Let’s start by prepping your refrigerator for the winter season.
Clean The Interior Of The Refrigerator
Before you winterize your Whirlpool refrigerator, it’s crucial to clean the interior thoroughly. Follow these steps:
- Empty the refrigerator: Remove all food items, including perishable and non-perishable items, from the refrigerator and freezer compartments. Take this opportunity to discard any expired or spoiled items.
- Remove shelves and drawers: Take out the removable shelves, drawers, and bins from the refrigerator. Wash them using warm water and mild detergent. Rinse thoroughly and let them dry completely before placing them back.
- Clean the interior: Wipe down the interior surfaces of the refrigerator using a solution of equal parts water and vinegar. This will help remove any lingering odors or stains. Pay special attention to the door seals and crevices. Use a soft cloth or sponge to prevent any scratches.
- Defrost the freezer: If your Whirlpool refrigerator has a built-in freezer, it’s essential to defrost it before winterizing. Turn off the appliance and leave the freezer door open. Allow the ice to melt naturally or use a gentle heat source like a hairdryer to speed up the process. Remember to place towels or a shallow pan to catch the water.
Check And Adjust The Temperature Settings
After cleaning the interior, the next step is to check and adjust the temperature settings of your Whirlpool refrigerator. This ensures that it maintains the ideal temperature for food storage during the winter. Here’s what you need to do:
- Consult the manufacturer’s manual: Refer to the user manual or check Whirlpool’s website for specific temperature recommendations for your model. Different models may have different optimal settings for winter storage.
- Adjust the thermostat: Locate the temperature control panel inside your refrigerator. Generally, it’s situated towards the back or on one side. Use the control dial or buttons to adjust the temperature settings. Aim for a temperature between 35 and 38 degrees Fahrenheit (or 2 and 3 degrees Celsius) for the refrigerator compartment and 0 degrees Fahrenheit (or -18 degrees Celsius) for the freezer compartment.
- Monitor the temperature: Place an external refrigerator thermometer to ensure that the internal temperature matches the set temperature. This will help you identify any fluctuations that might occur during the winter months.
By following these steps, you can ensure that your Whirlpool refrigerator with an ice maker is properly prepared for the winter season. Taking the time to clean the interior, remove food items, defrost the freezer, and adjust temperature settings will optimize the performance and efficiency of your refrigerator.
Remember that proper maintenance will not only prolong its lifespan but also keep your food fresh and safe throughout the winter.
Credit: storables.com
Emptying And Cleaning The Ice Maker
When it comes to winterizing your Whirlpool refrigerator with an ice maker, one crucial step is emptying and cleaning the ice maker. This not only ensures that your ice maker functions optimally but also helps to prevent any potential issues during the winter months.
In this guide, we will walk you through the steps to properly empty and clean your Whirlpool ice maker, so you can keep it in top shape throughout the winter season.
Turn Off The Ice Maker And Unplug The Refrigerator
The first step in emptying and cleaning your Whirlpool ice maker is to turn off the ice maker and unplug the refrigerator. This is important to ensure your safety and prevent any potential accidents. To do this:
- Locate the ice maker switch on the control panel of your refrigerator.
- Switch the ice maker to the “off” position to stop ice production.
- Unplug the refrigerator from the power source.
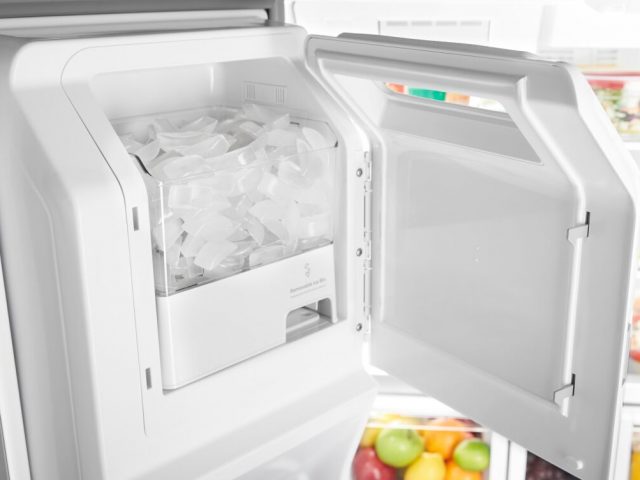
Remove The Ice Bin And Empty Any Remaining Ice
Once the ice maker is turned off and the refrigerator is unplugged, you can proceed to remove the ice bin and empty any remaining ice. Follow these steps:
- Locate the ice bin inside the freezer compartment.
- Hold the handle of the ice bin and gently lift it up to remove it from the freezer.
- Empty any ice cubes into a sink or a suitable container.
Clean The Ice Bin With Warm Soapy Water
To ensure your ice bin is clean and ready to use, it’s important to give it a thorough cleaning. Follow these steps to clean the ice bin:
- Prepare a mixture of warm water and mild dish soap.
- Dip a sponge or cloth into the soapy water and gently scrub the inside and outside of the ice bin.
- Rinse the ice bin with clean water to remove any soap residue.
- Allow the ice bin to air dry completely before placing it back into the freezer.
By following these simple steps, you can ensure that your Whirlpool refrigerator with an ice maker is properly winterized. Cleaning the ice maker and emptying the ice bin will help maintain the efficiency of the ice maker and prevent any potential issues during the winter months.
Remember to always refer to the manufacturer’s instructions specific to your Whirlpool refrigerator model for any additional details or recommendations.
Dealing With Water Supply Lines
When winter arrives, it is important to properly winterize your whirlpool refrigerator with an ice maker to prevent any potential damage. One of the crucial steps in this process is dealing with the water supply lines.
By following a few simple steps, you can ensure that your refrigerator is properly prepared for the colder months ahead.
Shut Off The Water Supply To The Refrigerator
Before you begin the process of winterizing your Whirlpool refrigerator, it is essential to shut off the water supply. This will prevent any water from flowing into your refrigerator and potentially causing damage from freezing. Locate the water supply shut-off valve, which is typically located behind the refrigerator or in the basement. Turn the valve clockwise until it is fully closed.
By shutting off the water supply, you are taking the necessary precautions to protect your refrigerator.
Disconnect The Water Supply Line From The Refrigerator
After you have shut off the water supply, the next step is to disconnect the water supply line from the refrigerator. To do this, you will need a wrench or pliers, depending on the type of connection. Carefully loosen the nuts or connections holding the water supply line in place, then gently pull the line away from the refrigerator.
Make sure to have a towel or a bucket ready to catch any remaining water that may drip out. By disconnecting the water supply line, you will prevent any residual water from freezing and damaging the refrigerator.
Drain And Remove Excess Water From The Supply Line
Once the water supply line is disconnected, it is important to drain and remove any excess water from the line. This will further minimize the risk of freezing and potential damage to your refrigerator. To do this, first, ensure that the water supply valve is still shut off.
Holding the supply line over a bucket or sink, carefully loosen the nuts or connections on the line to allow any remaining water to drain out. Once you have drained the excess water, remove the supply line completely from the area. This will ensure that there is no water left inside to freeze and cause damage during the winter months.
By following these steps to deal with the water supply lines of your Whirlpool refrigerator, you are taking important measures to protect it during the winter. Remember to always shut off the water supply, disconnect the supply line, and drain any excess water to ensure the longevity and performance of your refrigerator.
Protecting The Refrigerator From Freezing Temperatures
Move The Refrigerator Away From Drafty Areas
One important step to protect your Whirlpool refrigerator from freezing temperatures is to ensure that it is not located in a drafty area. Cold drafts can increase the risk of freezing and potentially damage the refrigerator’s components.
It is recommended to check the current location of your refrigerator and assess if it is exposed to any drafts. If you find that it is, consider moving it to a more suitable spot.
Insulate The Water Supply Line With Foam Tubing
The water supply line of your Whirlpool refrigerator, particularly the part that connects to the ice maker, is susceptible to freezing in colder temperatures. To safeguard it from freezing, it is essential to insulate the water supply line using foam tubing.
This insulation helps in maintaining a consistent temperature and prevents freezing which can potentially lead to leaks or other damage. Ensure that the foam tubing covers the entire length of the water supply line, from the back of the refrigerator to the water source.
Use A Surge Protector To Protect Against Power Surges
To ensure the longevity and safe operation of your Whirlpool refrigerator, it’s crucial to protect it from power surges – especially during the winter season when electrical issues are more prevalent. One effective way to safeguard against power surges is by using a surge protector.
A surge protector acts as a barrier between your refrigerator and sudden voltage spikes, helping to prevent any potential damage that might occur. Make sure to select a surge protector that can handle the power requirements of your Whirlpool refrigerator and connect it to a grounded electrical outlet for maximum protection.
Storing The Refrigerator During Winter Months
Clean The Exterior Of The Refrigerator
Before storing your Whirlpool refrigerator during the winter months, it’s important to give it a good cleaning. The exterior of the refrigerator can accumulate dirt, grime, and fingerprints over time.
Keeping the exterior clean not only improves the aesthetics but also ensures optimal performance. To clean the exterior, start by unplugging the refrigerator to avoid any electrical accidents. Then, using a mild detergent and warm water, gently wipe down the exterior surface with a soft cloth.
Pay special attention to areas that are prone to fingerprints and stains, such as the door handles and control panel. Once the exterior is clean, use a dry cloth to remove any moisture and prevent water spots.
Avoid using abrasive cleaners or rough sponges that could scratch the surface. Regular cleaning will not only keep your refrigerator looking great but also prolong its lifespan.
Unplug The Refrigerator And Prop The Door Open
When storing your Whirlpool refrigerator for an extended period, it’s critical to unplug it from the power source. This prevents unnecessary energy consumption and reduces the risk of electrical hazards.
Tip: Remember to remove all food items from the refrigerator before unplugging it. Properly dispose of any perishable items to avoid unpleasant odors or mold growth during storage.
After unplugging the refrigerator, prop the door open to allow air circulation. This step is crucial as it prevents the growth of mildew and odors inside the refrigerator. You can use a door stopper or a rolled-up towel to keep the door slightly ajar.
By propping the door open, you ensure that the refrigerator remains fresh and ready for use when you need it again.
Cover The Refrigerator To Prevent Dust And Debris Buildup
While storing your Whirlpool refrigerator during winter, it’s essential to protect it from dust and debris that might accumulate over time. By covering the refrigerator, you can prevent these particles from entering and potentially causing damage to the internal components.
Tip: Ensure that the refrigerator is thoroughly dry before covering it to prevent the growth of mold or mildew inside the cover.
You can use a refrigerator cover specifically designed for storage purposes or simply drape a large, breathable cloth over the refrigerator. Make sure the cover fits snugly but does not restrict airflow. This will prevent dust, pet hair, and other debris from settling on the coils, vents, and other sensitive parts of the refrigerator.
Note: It’s important not to use plastic covers or materials that do not allow airflow, as this can trap moisture and lead to mold growth.
By following these steps and properly winterizing your Whirlpool refrigerator, you can ensure that it remains in excellent condition and ready to use once the winter season is over.
Frequently Asked Questions For How To Winterize A Whirlpool Refrigerator With Ice Maker
How Do I Winterize My Whirlpool Refrigerator With Ice Maker?
To winterize your Whirlpool refrigerator with an ice maker, first empty and clean the ice bin. Turn off the ice maker and shut off the water supply. Remove any remaining water from the ice maker by running a cleaning cycle or using a turkey baster.
Finally, disconnect the water line and drain it completely.
Can Freezing Temperatures Damage My Whirlpool Refrigerator’s Ice Maker?
Yes, freezing temperatures can cause damage to your Whirlpool refrigerator’s ice maker. If water is left in the ice maker during freezing temperatures, it can freeze and expand, potentially cracking or breaking the ice maker components. Winterizing your refrigerator is important to prevent this damage.
What Happens If I Don’t Winterize My Whirlpool Refrigerator With Ice Maker?
If you don’t winterize your Whirlpool refrigerator with an ice maker, the remaining water can freeze and cause damage to the ice maker components. This can lead to leaks, malfunctions, and potentially costly repairs. It is important to winterize your refrigerator to avoid these issues and prolong its lifespan.
Conclusion
To ensure that your Whirlpool refrigerator with ice maker stays protected during the winter months, it is crucial to properly winterize it. By following the steps outlined in this blog post, you can prevent any potential damage caused by freezing temperatures.
From cleaning and defrosting to disconnecting the water supply and setting the right temperature, winterizing your refrigerator will prolong its lifespan and save you from costly repairs. Stay proactive in maintaining your appliance and enjoy the benefits of a well-maintained fridge year-round.
Hello Readers, I am Mechanic Shuvo, a seasoned refrigerator solution expert with over 11 years of hands-on experience in the field. Throughout my career, I've dedicated myself to understanding the ins and outs of refrigeration systems, honing my skills as a refrigerator mechanic. My passion for these appliances led me to create the website "refrigeratorsolutionsguide.com," where I aim to share my wealth of knowledge and expertise with others.
Over the years, I've encountered a wide range of refrigerator issues and have successfully resolved them all. From common problems like temperature fluctuations and strange noises to more complex technical issues, I've seen it all. Through my website, I hope to provide practical solutions, insightful tips, and guidance to help you keep your refrigerators running smoothly.